Mastering Fluxing Cannabis: Complete Guide
When it comes to plant training techniques, you might immediately think of methods like topping or LST. However, there’s a lesser-known technique that’s been gaining attention among cannabis cultivators: fluxing.
This innovative technique was developed by a renowned home grower and has been recognized for its ability to enhance yields and promote healthy plant growth. In this post, we’ll delve into everything you need to know about fluxing cannabis!
What is Fluxing?
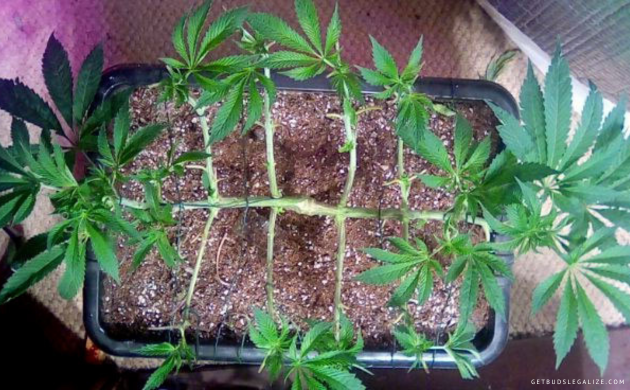
Fluxing is a plant training technique that combines manifolding, topping, ScrOGging, and low-stress training (LST). If you’re wondering why you should try fluxing, this section will explain it. We’ll also provide some background information on the method, followed by a comparison of the pros and cons of fluxing.
Why to Flux Weed Plants?
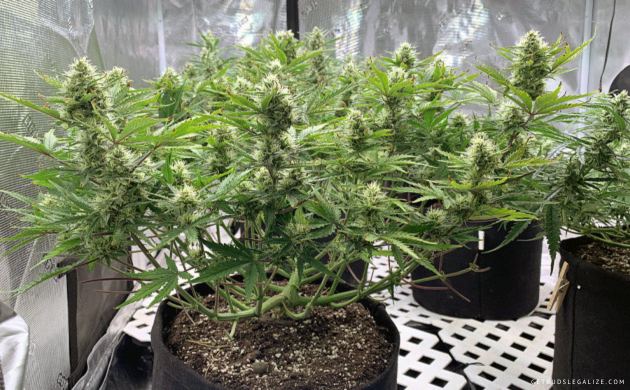
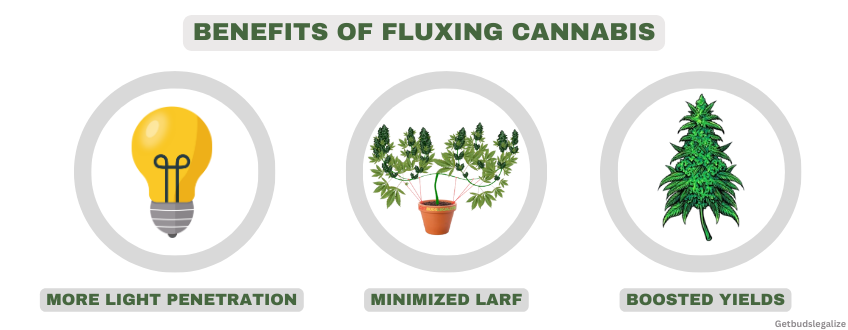
This is a question many growers ask themselves. The answer is simple: increase yield. When you flux your plants, you help them focus their energy on each branch instead of just the top. This leads to a uniform canopy where each branch receives the same light, resulting in a higher yield.
Additionally, the flux promotes better light penetration and top-to-bottom airflow. This improves the overall health of your plants and minimizes the chances of infections taking root. So, if you want to maximize yield and improve the health of your cannabis cultivation, fluxing is a must.
How Did The Flux Technique Start?
Although the technique of fluxing may seem unfamiliar to some growers, it has actually been in use for quite some time. Its origins can be traced back to 2014 when a grower named Light Addict built a grid from green twist ties and tried fluxing a single plant.
The technique proved to be successful, earning him significant praise online and boosting his clout. This led him to publish a book detailing the fluxing method and other growing tips.
What Are The Pros and Cons Of Fluxing Weed Plants?
Fluxing weed has multiple advantages. The most significant one is that it can boost your yields and reduce plant waste by evenly distributing the plant’s energy. Additionally, this technique is suitable for growing tall indoors as it creates numerous tops, allowing for cannabis sativa plants to grow outward rather than upward.
However, there are a few drawbacks to fluxing your plants. The most prominent one is that it requires more dedication than other techniques like manifold or the sea of green (SOG). Furthermore, you cannot use just any genetics for fluxing cannabis; you need to use photoperiodic plants that can be controlled to make them flower at the most appropriate time.
Marijuana Fluxing: Step By Step Guide
Let’s dive into the exciting part. In the following paragraphs, we’ll explain the necessary equipment you need to properly fluxing your weed. After that, we’ll move on to the main event and guide you through the process of fluxing your plants step-by-step.
Before You Start Fluxing Weed, Hear are some Basic Tips
It’s important to initiate the fluxing process when your plant is still young, typically, during the 3rd or 4th week.
Additionally, it’s crucial to keep your plant under constant light for most of the veg phase, about 24 hours. According to Light Addict, this will encourage your plant to stretch harder during the first two weeks of flowering than if you give them 16 or 18 hours of light.
Lastly, be careful not to tie green twist ties too tightly around your plant’s branches. Make sure to give them enough space to grow and avoid cutting off nutrient flow through their vascular system.
Equipment Needed For Fluxing:
- Green Twist Tie: Firstly, you will need a significant amount of green twist ties, which will be used to create a grid across the top of your canopy.
- Smart Pot: You will also need a large Smart Pot, preferably a 10-gallon one, perfect for using green twist ties for trellising. You can punch holes in the pot and anchor the green twist-tie directly to it.
- Trellis Netting: You can opt for pre-made trellis netting as an alternative to the green twist ties, but ensure it is anchored tightly to your Smart Pot.
- HPS Grow Lights: These kinds of lamps are highly recommended for the flux training of cannabis plants. Although CFL grow lamps were used in the initial guide by Light Addict, HPS lamps would be preferable as they pump out more lumens per watt to give your plants an extra boost, despite using more electricity.
Here's How To Do It:

STEP 1: Choose a healthy and vigorous plant that has at least three nodes. A node is where a branch or a leaf grows from the main stem. Cut off the top of the plant just above the third node. This will stimulate the growth of two new branches from the second node. These will become your main colas.

STEP 2: Lower branches and leaves (first and second nodes) should be pruned away. This will send the plant’s energy to the two major branches that will form the basis of your manifold.
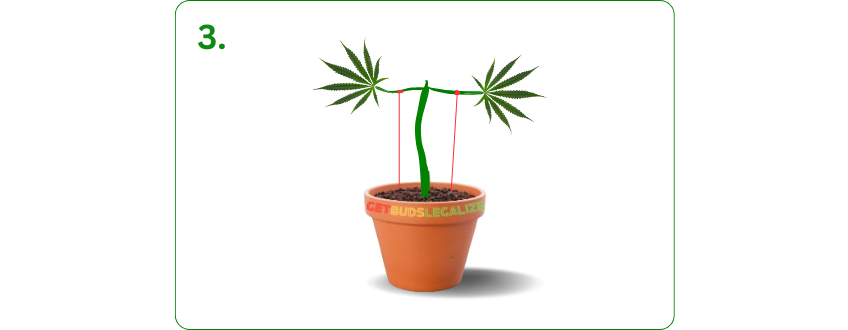
STEP 3: Wait for at least 3 days until your plant recovers from the topping. Then, transplant it into a large smart pot that has plenty of drainage holes. Once you transplant your plant, bend each of the two main branches down and secure them with green twist ties. You can also use a trellis net to support your branches and keep them in place.

STEP 4: After another few days, your secondary branches will have grown more nodes. These are called tertiary branches. Use green twist ties or trellis net to tie down each tertiary branch to the rim of the smart pot.
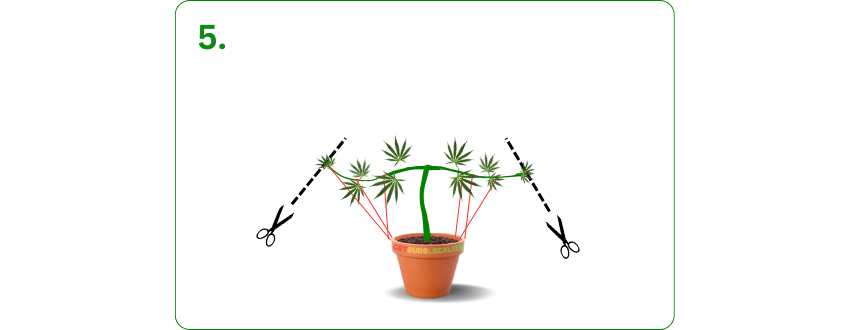
STEP 5: When the secondary branches have at least three nodes, it’s best to top them directly above the third node. Doing so will create two new growth points on each secondary branch, increasing the total number of colas.
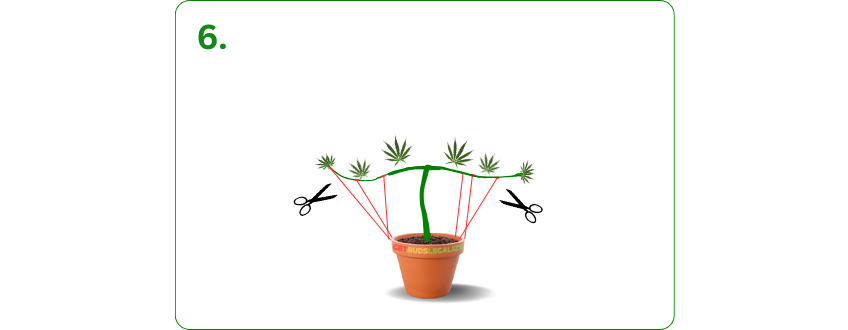
STEP 6: It’s important to eliminate any lower branches, leaves, or growth tips on secondary branches that won’t receive adequate light. This technique will enable the plant to concentrate its energy on the major colas.
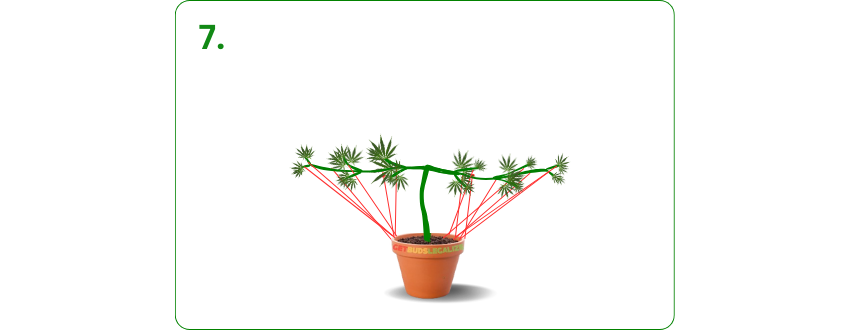
STEP 7: After another few days, your secondary branches will have grown more nodes. These are called tertiary branches. Use green twist ties or trellis net to tie down each tertiary branch to the rim of the smart pot.
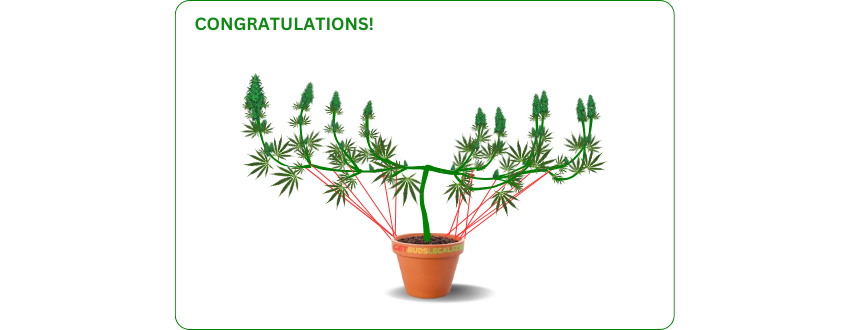
CONGRATULATIONS! Now, you just need to wait for another week before switching to the flowering stage. During this time, your plant will stretch and fill in any gaps in the canopy. Keep an eye on your plant and make sure it gets enough water, nutrients, and light, and enjoy the fruits of your labor!
Final Thought On The Cannabis Fluxing Technique
Fluxing cannabis is an advanced technique that requires patience, time, and effort to master. But if done successfully, it can lead to a bountiful harvest.
Faqs about Fluxing Cannabis and Growing Techniques
Fluxing is a variation of the manifolding technique, which involves splitting the main stem of your plant into two equal branches. This creates a symmetrical structure that allows for better light penetration and airflow.
Fluxing takes this a step further by removing some of the nodes from each branch and bending them horizontally. This creates a flat, grid-like shape that maximizes the use of the grow space and encourages the development of more bud sites.
From the data availability, growing cannabis with the fluxing technique brings numerous benefits, including:
- Increased yield: By creating more main colas, you can harvest more buds from each plant.
- Improved quality: By exposing more bud sites to direct light, you can improve the potency, flavor, and aroma of your buds.
- Reduced height: By keeping your plants low and wide, you can avoid stretching issues and fit more plants in a smaller area.
- Easier maintenance: By creating a uniform canopy, you can simplify your watering, feeding, and trimming routines.
Fluxing is best suited for photoperiod plants that have a longer vegetative phase. Autoflowers can also be fluxed, but they require more careful timing and less stress.
Indoor and outdoor fluxing is possible with sufficient space and time for plant training. Flux weed can also be advantageous to outdoor growers who prefer low-key plants or those who want to maximize sunlight exposure.
Manifolding and topping are two different ways of training your weed plants to grow more branches and buds. Manifolding involves creating a symmetrical structure with eight main branches that come from a single point at the base of the plant.
This is done by topping the plant twice and removing all the other branches except for four on each side. Topping involves cutting off the top of the main stem to encourage two or more branches to grow from that point. This can be done multiple times to create more branches, but they will not be as symmetrical or evenly distributed as manifolding.
Both techniques have their advantages and disadvantages, depending on your grow space, lighting, and strain. Manifolding can produce bigger and more uniform colas, but it takes more time and skill to execute.
Topping can produce more colas, but they may be smaller and less consistent. Manifolding also requires more space and light to spread out the branches, while topping can work better in restricted spaces and with centralized lighting.
Ultimately, the best technique for your weed plants depends on your personal preference and goals. You may want to experiment with both methods and see which one gives you the results you are looking for.
Manifolding is a technique of training cannabis to grow multiple main colas instead of one. Autoflowers are plants of cannabis that flower automatically without depending on the light cycle.
Some growers believe that manifolding on autoflowers is not a good idea because it can stress the plants and reduce their yield. However, others claim that this technique can increase their potency and quality, as long as it is done carefully and early in the plant’s life cycle.
The decision to manifold autoflowers depends on the grower’s preference, experience, and the strain of the plant.
ILGM Fertilizer

- From seedling to harvest, give your plants everything they need.
- Enough for feeding at least 5 plants.
- Discounted Package Deal
- Works well in soil, hydroponics, and other growing mediums.
- The best way to treat your plants
ILGM Plant Protector

- Protect your cannabis from diseases and harmful pests.
- Contains three 20 ml bottles.
- Enough supplies to protect 20 plants.
- It can be used in soil, hydroponic, and all other growing mediums.


