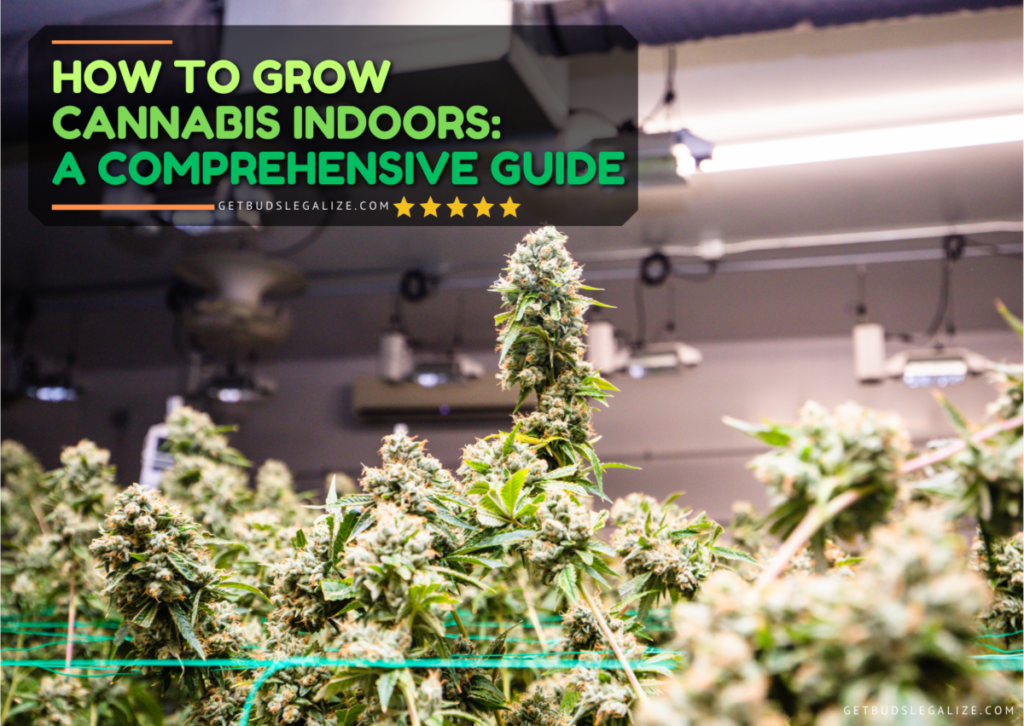
How to Grow Cannabis Indoors: A Comprehensive Guide
Cannabis is a versatile plant that can be grown in a variety of environments, from outdoor fields to indoor tents. However, such as more control over the growing conditions, higher quality buds, multiple harvests per year, and more privacy and security. In this guide, we will cover everything you need to know about how to grow cannabis indoors, from choosing the right strain and germinating the seeds to harvesting and curing your buds.
- What Are the Advantages of Growing Marijuana Indoors?
- How Long Does It Take to Grow the Cannabis Indoors?
- What Do I Need to Grow Cannabis Indoors?
- Growing Space
- Best Strain of Cannabis to Grow Indoors?
- Which Growing Method Should I Choose?
- Which is the Best Soil Mix for Growing?
- Choose the Correct Nutrients
- Growing Light
- Do I Need to Use CO2 Supplement in My Indoor Cannabis Cultivation?
- Pruning and Training
- Germinating and Seedling phase:
- The Vegetative phase:
- The Flowering Phase:
- Harvest Time
- How to Know When Your Plants Are Ready to Be Cut
- Drying and Curing:
- Challenges and Tips
- Conclusion
What Are the Advantages of Growing Marijuana Indoors?
One of the main advantages of growing indoors is complete control over the marijuana growing environment. Unlike outdoor cultivation, where growers have to deal with unpredictable weather, pests, diseases, and theft, indoor growers can create optimal conditions for their plants to thrive. Some of the benefits of controlling the environment are:
- Year-round harvests: Indoor growers can grow cannabis all year round, regardless of the season or climate. This means they can enjoy a continuous supply of fresh buds and experiment with different strains and techniques.
- Consistency in crop: Indoor growers can ensure consistency in their crop by using clones, seeds, or feminized seeds from reliable sources. They can also maintain a stable temperature, humidity, light cycle, and nutrient regime for their plants, which can result in uniform growth and quality.
- Control over flowering: Indoor growers can decide when to induce flowering in their photoperiod plants by changing the light cycle from 18/6 to 12/12. This allows them to manipulate the size and shape of their plants, as well as the duration and yield of their flowering cycle.
- Privacy: Indoor growers can keep their cannabis cultivation discreet and secure by using a grow box, a closet, a tent, or a dedicated room. They can also use carbon filters, fans, and ducts to reduce the smell and noise of their grow operation.
- Potency and quality: Many believe that cannabis grown indoors is of higher potency and quality than outdoor cannabis. This is because indoor growers can provide optimal light intensity and spectrum for their plants, as well as avoid contaminants such as dust, mold, insects, and pesticides.
How Long Does It Take to Grow the Cannabis Indoors?
The total time it takes to grow marijuana indoors depends on several factors, such as your setup, your plant size, and your strain choice. However, on average, most indoor growers can expect to spend 3-5 months from seedling to harvest. Here is a breakdown of how long each stage takes:
- Germination: 1-7 days: This is when you sprout your seeds using a moist paper towel, a glass of water, or directly in soil or coco coir. This stage can take anywhere from a few hours to a week, depending on the quality and age of your seeds.
- Vegetative: 4-8 weeks: This is when your plants grow stems and leaves and develop their structure and size. This stage can last as long as you want, depending on how big you want your plants to be. However, most indoor growers vegetate their plants for 4-8 weeks before switching them to flowering.
- Flowering: 7-12 weeks: This is when your plants start producing buds and resin. This stage can vary widely depending on your strain choice. Indica strains usually take 7-9 weeks to flower, while sativa strains can take 10-12 weeks or more. Autoflowering strains can flower in as little as 6-8 weeks from seed.
- Harvesting: 1 day: This is when you cut down your plants and remove the buds from the branches. This stage can take a few hours or a whole day, depending on how many plants you have and how you trim them.
- Drying: 5-15 days: Drying is the fifth step of growing cannabis indoors. It is when you hang your buds upside down in a dark and well-ventilated area until they are dry enough to snap off the stems. This stage can take anywhere from 5 days to 2 weeks or more, depending on the humidity. Drying is essential for preserving the quality and flavor of your buds. If you dry your buds too fast, they will lose their aroma and taste harsh.
What Do I Need to Grow Cannabis Indoors?
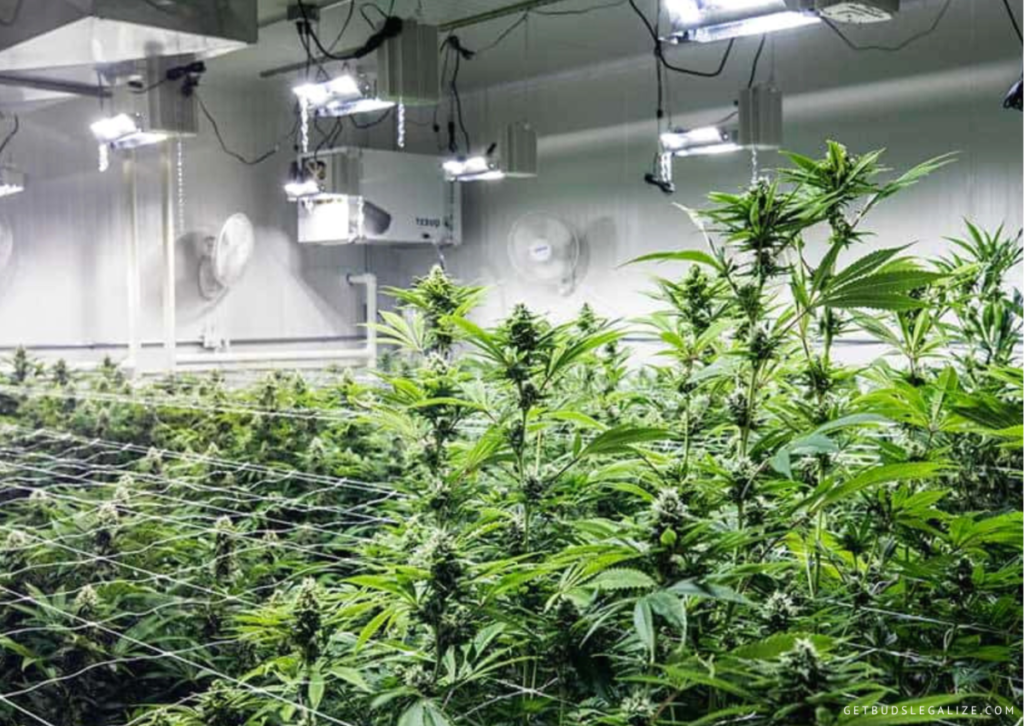
Growing cannabis indoors can be a rewarding and enjoyable hobby, but it also requires some planning, preparation, and equipment. Here are some of the essential things you will need to grow cannabis indoors successfully:
- A growing space: This is where you will place your plants and your lighting system. It can be a tent, a closet, a cabinet, a spare room, or any other enclosed area where you can control the temperature, humidity, and airflow. Make sure your grow space is clean, sanitized, and free of pests and contaminants. You will also need to install some reflective material on the walls to maximize light efficiency.
- A lighting system: This is what will provide your plants with the artificial light they need to grow and flower. There are different types of lights you can use, such as LED, fluorescent, or HID, but we recommend LED lights for their low heat output, energy efficiency, high light intensity, and long lifespan. You will also need a timer to turn the lights on and off according to the light cycle you choose for your plants (usually 18/6 for the vegetative stage and 12/12 for the flowering stage).
- A ventilation system: This is what will ensure your plants get fresh air and proper carbon dioxide levels, as well as remove excess heat and humidity from your growing space. You will need an extraction fan to pull out the stale air from your grow space and an odor filter to eliminate the smell of cannabis. You can vent the air outside through a window or a duct, or recirculate it inside with a carbon filter. You will also need an intake fan to bring in fresh air from outside or another room. Additionally, you will need an oscillating fan to circulate the air inside your grow space and prevent mold and pests.
- Pots and growing medium: This is what will hold your plants and provide them with water and nutrients. You can choose from different types of pots, such as plastic, fabric, or air pots, depending on your preference and budget. You can also choose from different types of growing mediums, such as soil, coco coir, rockwool, or hydroponics, depending on your skill level and desired results. Each medium has its own advantages and disadvantages, so you will need to do some research before deciding what works best for you.
- Seeds or clones: This is what will determine the genetics and characteristics of your plants. You can either start from seeds or clones (cuttings from another plant). Seeds offer more variety and stability, but they take longer to germinate and may not be feminized (meaning they could produce male plants that can ruin your crop). Clones offer more consistency and speed, but they may carry diseases or pests from the mother plant and may not be available in your area. You will need to choose a strain that suits your preferences, needs, and growing conditions.
- Water and nutrients: This is what will feed your plants and help them grow healthy and strong. You will need to provide your plants with clean water that has the right pH level (usually between 6.0 and 7.0 for soil and between 5.5 and 6.5 for hydroponics) and the right amount of nutrients (usually nitrogen, phosphorus, and potassium) according to their growth stage (vegetative or flowering) and their specific needs (some strains may require more or fewer nutrients than others). You will also need to monitor the moisture level of your growing medium and water your plants when they are dry (usually every 2-3 days for soil and every day for hydroponics).
These are some of the basic things you will need to grow cannabis indoors, but there are also other optional items that can enhance your growing experience, such as thermometers, hygrometers, pH meters, EC meters, scissors, trellis nets, magnifying glasses, etc.
Size and Design of Your Growing Space:
One of the most important factors to consider when growing cannabis indoors is the size and design of your growing space. The space you choose will affect the number of plants you can grow, the type of equipment you need, and the quality and quantity of your harvest. Here are some tips on how to choose and prepare your growing space for optimal results.
- Start small: If you are a beginner, it is advisable to start with a few plants and learn from your mistakes. You can always scale up later once you have mastered the basics. A small space is also easier to manage, cheaper to set up, and more discreet. You can use a closet, a cabinet, a tent, or even a shoebox as your growing space, as long as it can fit your plants and your lights.
- Keep it clean: Your growing space should be sanitized and free of any pests, contaminants, or mold. Cannabis plants are bioaccumulators, which means they absorb everything from their environment, including toxins and pathogens. A dirty space can compromise the health and quality of your plants, so make sure to clean it regularly and remove any debris or clutter.
- Seal it tight: Your growing space should be light-proof, meaning no light can enter or escape from it. Light is essential for cannabis growth, but it needs to be controlled and timed according to the plant’s life cycle. Cannabis plants need 12 hours of uninterrupted darkness to flower and produce buds. Any light leakage during this period can confuse and stress them, resulting in lower yields or hermaphroditic traits. You can use curtains, duct tape, or blackout materials to seal any cracks or gaps in your space.
- Ventilate it well: Your growing space should have adequate ventilation and air circulation to prevent overheating, humidity issues, and mold growth. Cannabis plants need fresh air rich in carbon dioxide to thrive and breathe. You can use fans, ducts, filters, or vents to create airflow in your space and exchange stale air with fresh air. You can also use an exhaust fan to remove hot air and odors from your space and direct them outside or through a carbon filter.
How Many Plants I Can Place Inside?
The number of cannabis plants you can grow indoors depends on several factors, such as the size of your growing space, the size of your pots, the type of lights you use, and the strain genetics of your plants. Generally, you want to avoid overcrowding your plants and give them enough space to branch out and receive adequate light and airflow.
A good rule of thumb is to leave at least six inches to a foot of room between the branches of your plants. Depending on the size and shape of your pots, you can fit up to nine 11-liter pots per square meter. However, this may vary depending on how big or small your plants are.
Some strains grow taller and bushier than others, and some growers prefer to train their plants to optimize their yield and space. If you are growing in a small grow tent, you may have 6 short plants or 3 short to medium-sized plants, 2 big plants, or 1 large plant. The choice is yours, but remember to consider the factors that influence how much an indoor cannabis plant will yield, such as genetics, plant care, lighting, and ventilation.
How to Choose the Best Strain of Cannabis to Grow Indoors?
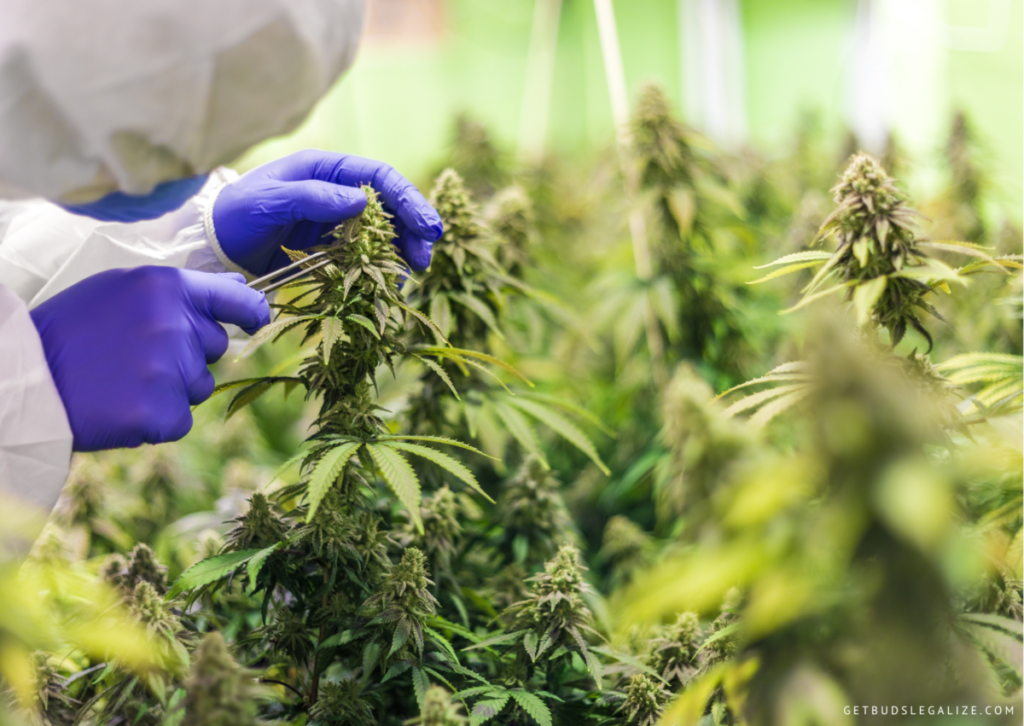
There are countless cannabis strains on the market, and growers spend a lot of time and resources constantly refining and creating new varieties of this centuries-old plant. However, not all strains are suitable for indoor growing, as some may grow too tall, too fast, or require specific light cycles or temperatures. Therefore, it is important to do some research before buying seeds or clones and choose a strain that matches your indoor space, equipment, and preferences.
Some factors to consider when choosing a strain are:
- Size: Some strains can grow up to several meters in height, which may not fit in your indoor space or cause problems with light penetration and ventilation. Indica-dominant strains tend to be shorter and bushier than sativa-dominant strains, which are more slender and taller. You can also look for autoflowering strains, which are genetically modified to flower automatically regardless of the light cycle and usually stay compact and small.
- Yield: The yield refers to the amount of buds you can expect to harvest from each plant. Of course, this depends on many factors, such as the growing conditions, the nutrients, the training techniques, and the genetics of the strain. Some strains are known for producing heavy yields, while others may produce less but higher quality buds. You can check online reviews or seed banks for information on the average yield of different strains.
- Potency: The potency of cannabis is determined by the concentration of cannabinoids and terpenes in the buds. The most common cannabinoid is THC (tetrahydrocannabinol), which is responsible for the psychoactive effects of cannabis. CBD (cannabidiol) is another cannabinoid that has many medical benefits and can counteract some of the negative effects of THC. Terpenes are aromatic compounds that give cannabis its distinctive flavors and aromas and also have various effects on mood and health. Some strains have high levels of THC, CBD, or both, while others may have a balanced ratio or a unique terpene profile. You can choose a strain that suits your desired effects and tastes.
- Flavor and aroma: Cannabis comes in a wide range of flavors and aromas, from fruity and floral to earthy and spicy. Some people prefer sweet and smooth strains, while others enjoy pungent and skunky ones. The flavor and aroma of cannabis are influenced by the terpenes present in the buds, as well as by the curing process. You can choose a strain that appeals to your senses or try different ones to discover new sensations.
Which Growing Method Should I Choose?
Cannabis indoor grow methods are varied and depend on the preference, budget, and skill level of the grower. Some of the most common methods are:
- Hydroponics: This is a method of growing cannabis without soil, using a nutrient-rich water solution instead. Hydroponics allows for greater control over the environment and nutrient uptake of the plants, resulting in faster growth and higher yields. However, hydroponics requires more equipment, maintenance, and monitoring than soil, and it is more prone to problems such as pests, diseases, and pH fluctuations.
- Aeroponics: This is a type of hydroponics that uses a mist of nutrient solution to feed the roots of the plants, which are suspended in the air. Aeroponics provides the highest level of oxygenation and nutrient delivery to the roots, resulting in rapid growth and exceptional quality. However, aeroponics is also the most expensive and complex method of growing cannabis indoors, and it requires a lot of attention and care to prevent root rot and system failure.
- Coco coir: This is a medium made from the husks of coconuts, which are shredded and processed into a fibrous material. Coco coir has many benefits for growing cannabis indoors, such as high water retention, good aeration, natural pH buffering, and resistance to pests and fungi. Coco coir can be used as a standalone medium or mixed with perlite or vermiculite to improve drainage. Coco coir also works well with hydroponic systems, as it can be easily flushed and reused.
- Soil: This is the traditional and simplest way to grow cannabis indoors. Soil provides a natural medium for the roots to absorb nutrients and water, and it is forgiving of mistakes. Soil can be enriched with organic matter, such as compost or worm castings, to improve its quality and drainage. Soil also helps buffer the pH level of the solution, which is important for optimal plant health.
Which is the Best Soil Mix to Use for Growing Your Medical Cannabis?
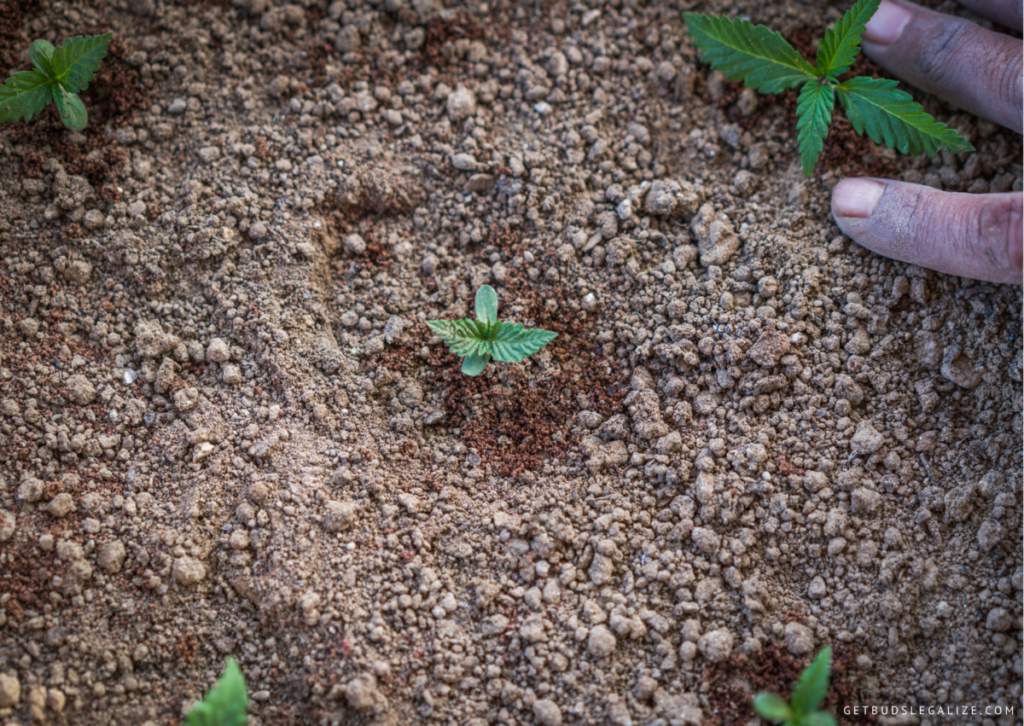
We will compare their advantages and disadvantages, and help you decide which one is the best for your needs and preferences.
Light Mix:
A light mix is a pre-made soil mix that contains a low amount of nutrients and organic matter. It is usually composed of peat moss, perlite, vermiculite, and some additives like lime or dolomite to adjust the pH. A light mix is designed to be light and airy, allowing for good drainage and oxygenation of the roots. It also gives you more control over the feeding schedule and nutrient levels of your plants, as you can add fertilizers according to your plants’ needs.
The main advantage of using a light mix is that it is easy to use and widely available. You can find it in most garden centers or online shops, and you don’t need to prepare it yourself. It is also suitable for beginners, as it reduces the risk of overfeeding or nutrient lockout. A light mix can also be used for different strains and stages of growth, as you can adjust the nutrient strength accordingly.
The main disadvantage of using a light mix is that it requires more attention and maintenance than other mediums. You have to monitor the pH and EC (electrical conductivity) of your water and soil regularly and adjust them if needed. You also have to water your plants more frequently, as a light mix dries out faster than other mediums. Additionally, you have to buy and store fertilizers separately, which can add to the cost and complexity of your growth.
Super Soil
Super soil is a pre-made soil mix that contains a high amount of nutrients and organic matter. It is usually composed of compost, worm castings, bat guano, bone meal, kelp meal, and other natural ingredients that provide a rich and balanced diet for your plants. Super soil is designed to be self-sufficient and long-lasting, eliminating the need for additional fertilizers or pH adjustments.
The main advantage of using super soil is that it simplifies your growth and reduces your workload. You don’t have to worry about feeding your plants or checking the pH or EC of your soil, as the super soil provides everything your plants need from seed to harvest. You also don’t have to water your plants as often, as super soil retains moisture better than other mediums. Additionally, you can benefit from the enhanced flavor, aroma, and potency of your buds, as super soil enhances the terpene production and expression of your plants.
The main disadvantage of using super soil is that it can be expensive and hard to find. You can either buy it from specialized online shops or make it yourself, but both options require time, money, and space. It can also be tricky to use for beginners, as it requires careful preparation and calibration before use. You have to make sure that the super soil is properly cooked (composted) and cured (aged) before planting your seeds or clones, otherwise, you may burn or stunt your plants. You also have to be careful not to overwater or underwater your plants, as super soil can be sensitive to moisture levels.
Living Soil
Growing cannabis in living soil is a method that mimics the natural soil of forests, prairies, and wetlands, where organic matter is decomposed by microorganisms and recycled into nutrients for plants. Living soil is rich in beneficial bacteria, fungi, worms, and other organisms that help with nutrient synthesis, aeration, water retention, and pest control. Some of the advantages of growing cannabis in living soil are:
- It produces cannabis with superior terpene content and flavor.
- It reduces the need for fertilizers and pesticides.
- It is environmentally friendly and sustainable.
- It creates a more satisfying and cathartic gardening experience.
However, growing cannabis in living soil also has some disadvantages, such as:
- It can be heavy and cumbersome to transport and store.
- It can have issues with pests and diseases if not properly managed.
- It has diminished moisture retention compared to other growing media.
- It requires more time and patience to prepare and maintain.
Therefore, growing cannabis in living soil is a rewarding but challenging method that requires careful planning and execution. It is not recommended for beginners or growers who want fast and easy results. However, for those who value quality over quantity and enjoy working with nature, living soil can offer a unique and satisfying way to cultivate cannabis.
Choose the Correct Nutrients for Every Stage of Grow
ILGM Fertilizer
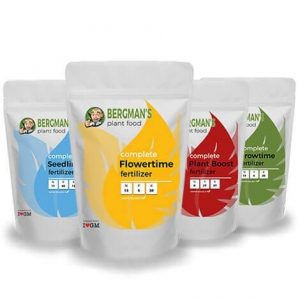
- From seedling to harvest, give your plants everything they need.
- Enough for feeding at least 5 plants.
- Discounted Package Deal
- Works well in soil, hydroponics, and other growing mediums.
- The best way to treat your plants
ILGM Plant Protector
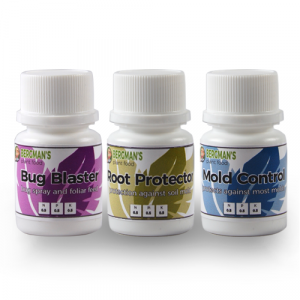
- Protect your cannabis from diseases and harmful pests.
- Contains three 20 ml bottles.
- Enough supplies to protect 20 plants.
- It can be used in soil, hydroponic, and all other growing mediums.
To grow marijuana indoors, you will need to provide your plants with the right amount and type of nutrients depending on the stage of growth. You can use liquid or powdered fertilizers that are specially formulated for weed plants. You can also use organic amendments like compost, worm castings, or bat guano to enrich your soil with natural nutrients. You will need to adjust the pH of your water and nutrient solution to ensure optimal nutrient uptake by your plants. The ideal pH range for cannabis is between 6.0 and 7.0 for soil and between 5.5 and 6.5 for hydroponics.
Nutrients are vital for marijuana plants, but too much or too little can cause problems. You should follow the instructions on your fertilizer package and start with a low dose. You should also monitor your plants for signs of nutrient deficiency or toxicity, such as yellowing leaves, burnt tips, or stunted growth. If you notice any issues, you should flush your plants with plain water and adjust your feeding schedule accordingly.
Growing Light:
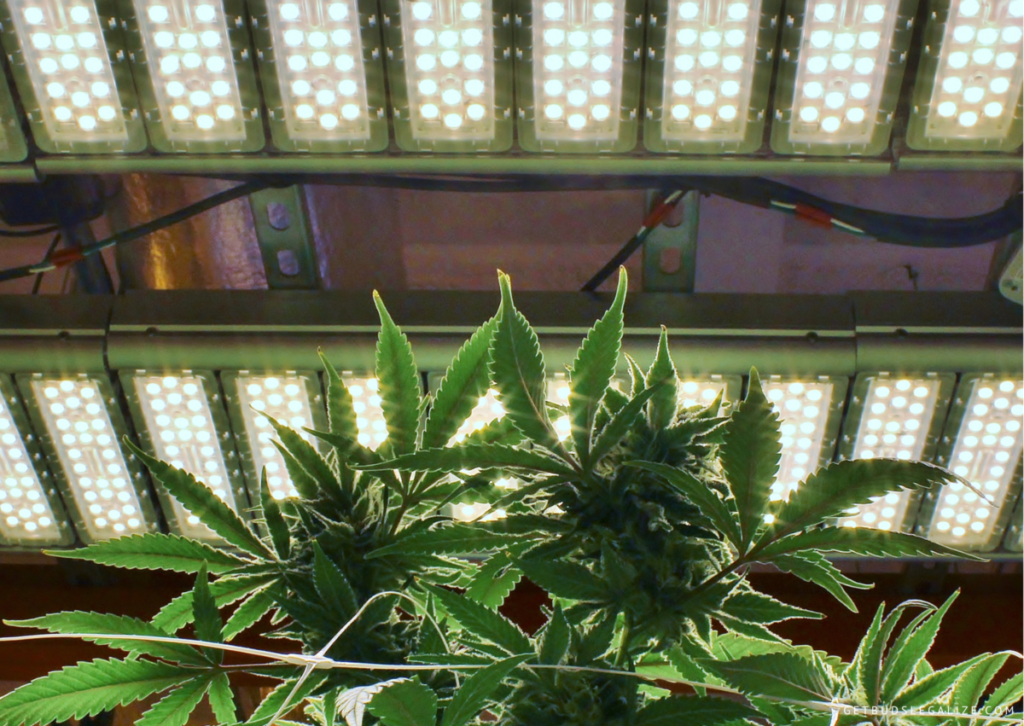
Growing weed indoors can be a rewarding and enjoyable hobby, but it also comes with some challenges. One of the most important factors to consider is the type of light you provide for your plants. Different plants have different light requirements, and choosing the wrong light can affect their growth, health, and flowering.
What and Why Light is Important for Plants?
Light is electromagnetic radiation that travels in waves. It has different wavelengths and frequencies, which determine its color and energy. The visible spectrum of light ranges from violet to red, and each color has a different effect on plants.
Plants use light as a source of energy to perform photosynthesis, the process of converting water and carbon dioxide into sugars and oxygen. Photosynthesis is essential for plant growth and development, as well as for producing flowers and fruits.
Plants also use light as a signal to regulate their biological cycles, such as germination, flowering, and dormancy. For example, some plants need a certain number of hours of darkness or light to trigger flowering, while others need a specific ratio of red to far-red light to determine their stem length and branching.
How to Measure Light Intensity and Quality?
Light intensity refers to the amount of light that reaches a given area. It is measured in units called lumens (lm), which indicate how bright a light source is. The higher the lumens, the brighter the light.
Light quality refers to the color or spectrum of light that a source emits. It is measured in units called kelvins (K), which indicate the color temperature of a light source. The higher the kelvins, the colder or bluer the light (ideal for the vegetative phase); the lower the kelvins, the warmer or redder the light (ideal for the flowering phase).
Light intensity and quality can be measured using various tools, such as lux meters, PAR meters, or spectrometers. However, these tools can be expensive and complicated to use for beginners. A simpler way to estimate light intensity and quality is to use your eyes and observe how your plants react to different lights.
How to Choose the Best Indoor Grow Lights for Cannabis?
There is no single answer to this question, as different plants have different light preferences. However, here are some guidelines that can help you make a decision.
First, you need to consider the size and shape of your growing space and how many plants you want to grow. For example, if you have a small windowsill or shelf with a few pots, you may be able to use natural sunlight or a simple desk lamp. However, if you have a large room or tent with many plants, you may need artificial lighting with more power and coverage.
Second, you need to compare the advantages and disadvantages of different types of artificial lights available on the market. Here are some of the most common ones:
- Fluorescent lights: These are tubes or bulbs that emit low-intensity and cool-white light. They are cheap, easy to find and install, and energy-efficient. They are suitable for seedlings, cuttings, herbs, and leafy greens. However, they have a low lifespan (about 10,000 hours), produce heat that can damage plants if placed too close, and lack some wavelengths that plants need for flowering and fruiting.
- LED lights: These are diodes that emit high-intensity and full-spectrum light. They are expensive, but they last longer (about 50,000 hours), consume less electricity, produce less heat, and can be customized to suit different plant needs. They are suitable for all kinds of plants at all stages of growth. However, they can be too bright for some plants if placed too close or without proper ventilation.
- HID & HPS lights: These are bulbs that emit high-intensity and warm-white light. They are cheaper than LED lights but more expensive than fluorescent lights. They have a high lifespan (about 20,000 hours), produce more lumens per watt than other lights, and can promote vigorous growth and flowering in plants. However, they also produce a lot of heat that requires cooling systems or fans, consume more electricity than other lights, and need ballasts or transformers to operate.
- CFL lights: These are compact fluorescent lamps that emit a spectrum of light suitable for plant growth. They are energy-efficient, easy to install, and relatively inexpensive. CFL lights are ideal for small spaces and low-light plants, such as herbs, lettuce, and microgreens. However, they have some drawbacks, such as low light intensity, heat output, and short lifespan. Therefore, they may not be the best choice for large-scale or high-light plants, such as tomatoes, peppers, and cannabis. To use CFL lights effectively, you need to consider the following factors: wattage, color temperature, distance, and reflectors.
Do I Need to Use CO2 Supplement in My Indoor Cannabis Cultivation?
CO2 is a gas that plants use to perform photosynthesis, the process of converting light into energy and biomass. CO2 is naturally present in the air at a concentration of about 400 parts per million (ppm). However, some indoor cannabis growers choose to supplement their grow rooms with additional CO2 to boost their plants’ growth and yield.
The benefits of using carbon dioxide when you grow cannabis indoors are mainly related to increasing the rate of photosynthesis and allowing the plants to use more light and nutrients. By providing more CO2, the plants can absorb more light and produce more sugars and starches, which are then used for growth and flowering. This can result in faster vegetative growth, bigger buds, higher potency, and improved resistance to pests and diseases.
However, using CO2 in indoor cultivation also has some drawbacks and challenges. First of all, CO2 supplementation is not cheap or easy. It requires a source of CO2 (such as a tank or a generator), a regulator, a timer, a controller, and a distribution system (such as fans or ducts). It also requires careful monitoring and adjustment of the CO2 levels, temperature, humidity, and ventilation in the grow room. Too much or too little CO2 can have negative effects on plants and the environment.
Secondly, CO2 supplementation is not necessary or effective for all indoor cannabis growers. It depends on several factors, such as the size and design of the grow room, the type and intensity of the lighting system, the strain and genetics of the plants, and the skill and experience of the grower. Generally speaking, CO2 supplementation is only recommended for advanced growers who have optimized their grow room conditions and lighting system, and who can provide enough light (at least 800 watts per square meter) to match the increased CO2 levels. Otherwise, adding CO2 may not make a significant difference or may even be counterproductive.
Therefore, before deciding to use CO2 in your indoor grow space, you should consider your goals, budget, resources, and capabilities. You should also do your research and learn how to use CO2 safely and effectively. CO2 can be a powerful tool to enhance your indoor cannabis growing, but it is not a magic bullet that will solve all your problems or guarantee success.
Pruning and Training:
Pruning and training are two techniques that can help you grow cannabis indoors more efficiently and increase your yield.
- Pruning involves removing unwanted parts of the plant, such as lower branches, leaves, or buds, that are not getting enough light or are taking up too much energy. This allows the plant to focus on the main colas and produce bigger and denser buds.
- Training involves manipulating the shape and structure of the plant, such as bending, tying, or topping, to create a more even canopy and expose more bud sites to the light. This can also help you control the height and width of the plant and fit more plants in a limited space.
Both pruning and training should be done carefully and gradually, as they can stress the plant and slow down its growth if done too aggressively or too late in the flowering phase.
Now It's Time To Start Growing your Medical Marijuana: Germinating and Seedling Stage
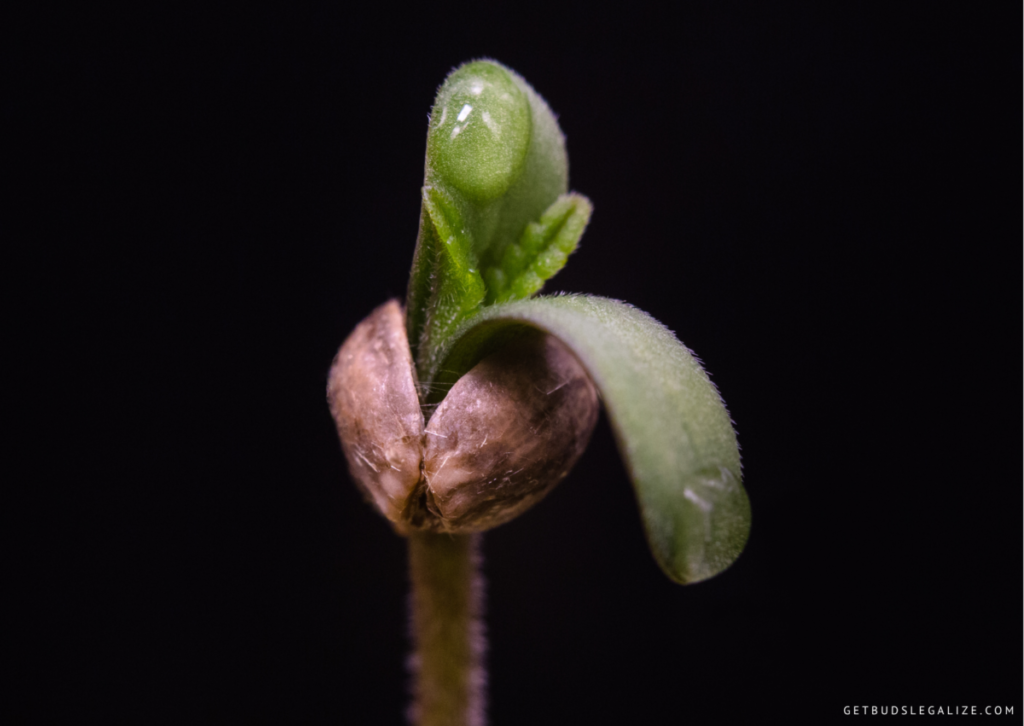
Once you have chosen your strain and obtained your seeds, you need to germinate them before planting them in soil or in a starter cube. Germination is the process of activating the seed and allowing it to sprout a root and a stem. There are different methods to germinate cannabis seeds, such as using paper towels, peat pellets, rockwool cubes, or directly in the soil. The method you choose depends on your personal preference, availability of materials, and environmental conditions. Here are some general tips to follow when planting your cannabis seeds:
- Soak your cannabis seeds in water for 12 to 24 hours before planting. This will help them absorb moisture and activate the germination process. You can also add some hydrogen peroxide or a seedling booster to the water to prevent fungal infections and stimulate growth.
- Prepare your planting medium. You can use soil, coco coir, perlite, vermiculite, or a mix of these as your growing medium. Make sure it is moist but not soggy, and has good drainage and aeration. You can also add some organic fertilizers or amendments to enrich the soil and provide nutrients for your seedlings.
- Make a small hole in the center of your planting medium, about half an inch deep. Place your cannabis seed in the hole with the pointed end facing down. Gently cover the seed with some soil and lightly press it down. Do not bury the seed too deep or too shallow, as this can affect its germination rate and growth.
- Place your planted seeds in a warm and dark place, such as a closet, a cupboard, or a propagator. The ideal temperature for cannabis seed germination is between 70°F and 85°F (21°C and 29°C). You can use a heating mat or a lamp to maintain a consistent temperature. Avoid exposing your seeds to direct light or cold drafts, as this can stress them and slow down their germination.
- Check on your seeds daily and keep the soil moist but not wet. You should see the first signs of germination within 3 to 7 days, depending on the strain and the method you used. You will notice a white taproot emerging from the seed coat, followed by a green sprout with two cotyledons (seed leaves).
- Once your cannabis seedlings have emerged from the soil, you can move them to a brighter and cooler place, such as under a fluorescent light or an LED grow light. Keep the light at least 6 inches away from the seedlings and adjust it as they grow taller. The ideal light cycle for cannabis seedlings is 18 hours of light and 6 hours of darkness per day.
- Water your cannabis seedlings sparingly and carefully, using a spray bottle or a dropper. Avoid overwatering or underwatering them, as this can cause root rot or wilting. You can also mist them with water occasionally to increase humidity and prevent them from drying out.
- Feed your cannabis seedlings with a mild nutrient solution once they have developed their first pair of true leaves (the ones that look like cannabis leaves). Start with a quarter-strength dose of a balanced fertilizer (such as 10-10-10) and gradually increase it to half-strength over time. Do not overfeed your seedlings, as this can cause nutrient burn or lockout.
- Transplant your cannabis seedlings to larger pots when they have outgrown their current containers. You can use plastic pots, fabric pots, air pots, or smart pots as your final pots. Make sure they have enough drainage holes and are filled with fresh and fertile soil. Be gentle when handling your seedlings and avoid damaging their roots or stems.
The Vegetative Stage:
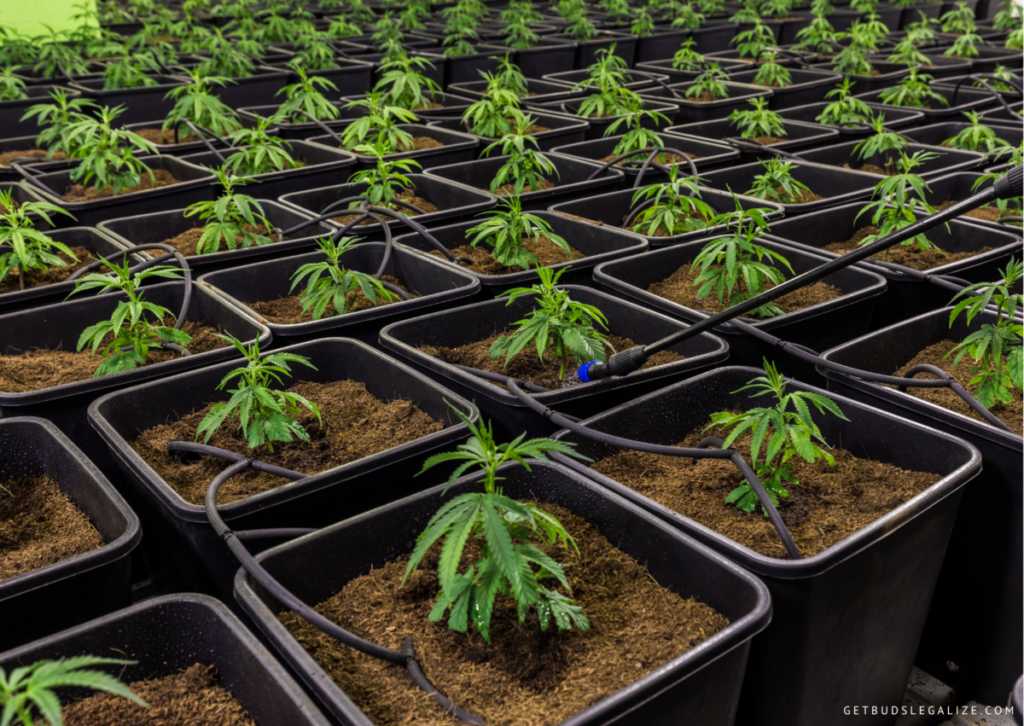
The vegetative stage is the phase of cannabis growth when the plant develops its structure, such as stems, branches, and leaves. It is also the time when the plant grows rapidly in size and height. To do that you will need to provide the following:
Airflow: One of the important factors for growing cannabis indoors is the airflow during the vegetative stage. Airflow helps to strengthen the stems, prevent mold and pests, and regulate the temperature and humidity of the grow room. Here are some tips on how to improve the airflow for your cannabis plants:
- Use an exhaust fan to remove hot and stale air from the grow room and create negative pressure. This will also help to control the odor of the plants.
- Use an intake fan to bring fresh and cool air into the grow room and create positive pressure. This will also help to prevent dust and bugs from entering the grow room.
- Use oscillating fans to circulate the air around the plants and create a gentle breeze. This will also help to prevent hot spots and increase the CO2 availability for the plants.
- Avoid placing the fans directly on the plants, as this can cause windburn or stress. Aim the fans above or below the canopy level, and adjust them as needed.
Lighting: During the vegetative stage, cannabis plants need a lot of light to grow strong and healthy. You want to provide 16 to 20 hours of light per day and keep the light intensity high. You can use fluorescent lights, metal halide lights, or LED lights for this stage. The optimal light spectrum for vegetative growth is blue or cool white.
You also need to adjust the distance between the lights and the plants to avoid burning or stretching them. A good rule of thumb is to keep your hand at the top of the plant canopy and feel the heat. If it’s too hot for you, it’s the same for your plants. You can also use a light meter to measure the light intensity in lumens or PAR (photosynthetically active radiation).
The vegetative stage lasts for about 4 to 8 weeks, depending on the strain and your preference. Lighting is a crucial aspect of indoor cannabis cultivation. By providing the right amount and quality of light, you can ensure a successful harvest.
- Temperature: The optimal temperature range for cannabis plants in the vegetative stage is between 22 – 26º C (72 – 79º F). Temperatures above or below this range can stress your plants and cause problems such as wilting, stunted growth, nutrient deficiencies, pests, mold, or hermaphroditism. To monitor and control the temperature in your indoor grow room, you will need a thermometer, a fan, an exhaust system, and a heater or air conditioner if necessary.
- Humidity: The optimal humidity range for the vegetative stage is between 60% and 70%, depending on the temperature and the strain of cannabis. A hygrometer can help you monitor the humidity in your indoor grow room. You can also use a humidifier or a dehumidifier to adjust the humidity as needed. Humidity levels that are too high or too low can affect the growth and health of your cannabis plants, so make sure to check them regularly and keep them within the optimal range.
- Nutrients: Cannabis plants need a balanced and adequate nutrient supply during the vegetative stage to support their growth and development. You can use either organic or synthetic nutrients, but make sure they are suitable for cannabis and match your growing medium (soil, coco coir, hydroponics, etc.). During this stage, cannabis plants need more nitrogen than phosphorus and potassium, as nitrogen promotes foliage production. You also need to provide your plants with micronutrients, such as calcium, magnesium, iron, and others, that your plants use in smaller amounts. You can follow a feeding schedule provided by your nutrient manufacturer or adjust it according to your plants’ needs.
- Pruning and Training: Pruning and training are essential techniques for indoor growers, especially during the vegetative stage. Pruning involves removing unwanted leaves and branches that may block light or airflow, or consume energy that could be used for bud production. Training involves manipulating the shape and structure of the plant to create a more even canopy, increase light exposure, and maximize yield. There are different methods of training, such as topping, fimming, low-stress training (LST), and high-stress training (HST). Each method has its own advantages and disadvantages, so it is important to research and experiment to find what works best for your plants and your growing space.
The vegetative phase ends when you switch the light cycle to 12 hours of light / 12 hours of darkness, which triggers the flowering phase. You should only do this when your plants are mature enough and have reached at least half of their desired final height, as they will continue to stretch during the first few weeks of flowering.
The Flowering Stage:
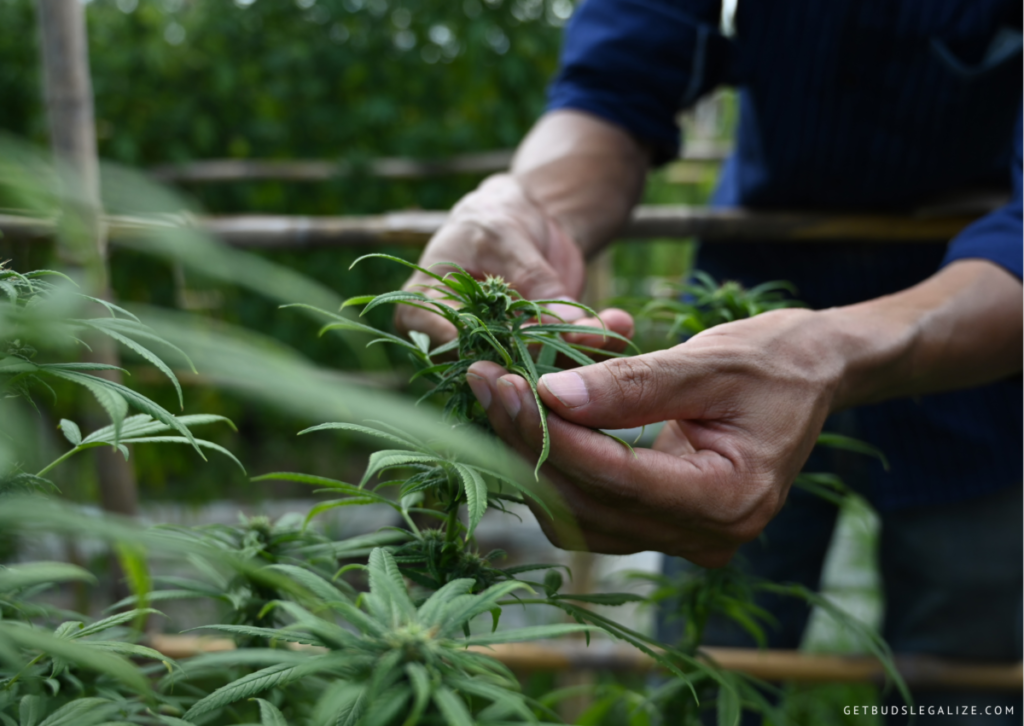
The stage of flowering is the final and most rewarding phase of the cannabis plant’s life cycle. It is when the plant produces resinous buds that contain the cannabinoids and terpenes that give cannabis its unique effects and flavors. The flowering of cannabis can last from 6 to 16 weeks, depending on the strain and the environmental conditions.
The flowering is triggered by a change in the light cycle, either naturally or artificially. Outdoors, cannabis plants start to flower when the days get shorter and the nights get longer, usually around late summer or early fall. Indoors, growers can induce flowering by switching the light cycle from 18/6 (18 hours of light and 6 hours of darkness) to 12/12 (12 hours of light and 12 hours of darkness).
The flowering phase can be divided into three main phases: the pre-flowering phase and the full-flowering phase, and the ripening:
- The pre-flowering phase begins when you switch to a 12/12 light cycle. During this phase, your plants will undergo a rapid growth spurt, known as the stretch. They can double or even triple their size in a few weeks, so make sure you have enough vertical space in your grow room. This is also when you will be able to identify the sex of your plants by looking for pre-flowers, which are small clusters of pistils (female) or pollen sacs (male) that appear at the nodes.
- In the full-flowering phase, the plant starts to produce buds, which are the structures that contain the cannabinoids and terpenes that give cannabis its effects and flavors. The buds grow larger and denser as the plant receives less light and more dark hours per day, triggering its hormonal response to flower. The flowering phase can last from 6 to 12 weeks, depending on the strain and the environmental conditions.
- In the ripening phase, the plant reaches its peak of cannabinoid and terpene production, and the buds become ready for harvest. The ripening phase can be identified by observing the color and shape of the pistils and trichomes on the buds. The pistils are the hairs that protrude from the buds, and they change from white to orange or brown as they mature. The trichomes are the resin glands that cover the buds, and they change from clear to cloudy or amber as they mature. The ripening phase can last from a few days to a few weeks, depending on the strain and the desired effects.
How to Care for Your Plants During the Flowering:
The flowering phase requires different care and maintenance than the vegetative. Here are some tips on how to optimize your plants’ health and performance during this crucial stage:
• Adjust your nutrients: Your plants will need more phosphorus and potassium during flowering, as these elements are essential for bud development. You can use a bloom-specific fertilizer or supplement your base nutrients with a PK booster. Reduce the amount of nitrogen, as too much can inhibit bud growth and affect the taste and smell of your buds.
• Monitor your pH and EC levels: The pH and EC levels of your water and soil affect how well your plants can absorb nutrients. The optimal pH range for cannabis is 6.0 to 7.0 for soil and 5.5 to 6.5 for hydroponics. The optimal EC range depends on the stage of growth and the strain, but generally, it should be between 1.2 and 1.6 during flowering. Use a pH meter and an EC meter to measure and adjust these levels accordingly.
• Prune your plants selectively: Pruning can improve airflow, light penetration, and bud quality by removing unnecessary leaves and branches. However, pruning should be done sparingly and carefully during flowering, as too much can stress your plants and reduce their yield. Only remove leaves that are yellowing, dying, or blocking light from lower buds. Avoid topping or fiming your plants during flowering, as this can stunt their growth.
• Support your plants if needed: Some strains may produce heavy buds that can weigh down your branches and cause them to snap or bend. To prevent this, you can use stakes, trellis nets, or plant ties to support your plants and distribute their weight evenly.
• Control your temperature and humidity levels: Temperature and humidity are two environmental factors that affect the growth and development of weed plants. They also influence the risk of pests and diseases, as well as the quality and quantity of your buds. Here are some tips on how to control your temperature and humidity levels during the flowering:
- Temperature: The ideal temperature range for your plants during flowering is between 65°F and 80°F (18°C and 26°C). If the temperature is too high, your plants may suffer from heat stress, which can reduce their yield and potency. If the temperature is too low, your plants may slow down their metabolism and growth, which can also affect their bud production. To control your temperature, you can use fans, air conditioners, heaters, or thermostats in your grow room. You can also adjust your lighting schedule to avoid exposing your plants to extreme temperatures during the day or night.
- Humidity: The ideal humidity range for your cannabis during flowering is between 40% and 50%. If the humidity is too high, your plants may be more prone to mold and mildew, which can ruin your buds and pose a health risk. If the humidity is too low, your plants may lose moisture through their leaves, which can cause them to wilt and dry out. To control your humidity, you can use dehumidifiers, humidifiers, or hygrometers in your grow room. You can also increase or decrease your ventilation to regulate the airflow and moisture level in your growing space.
Harvest Time:
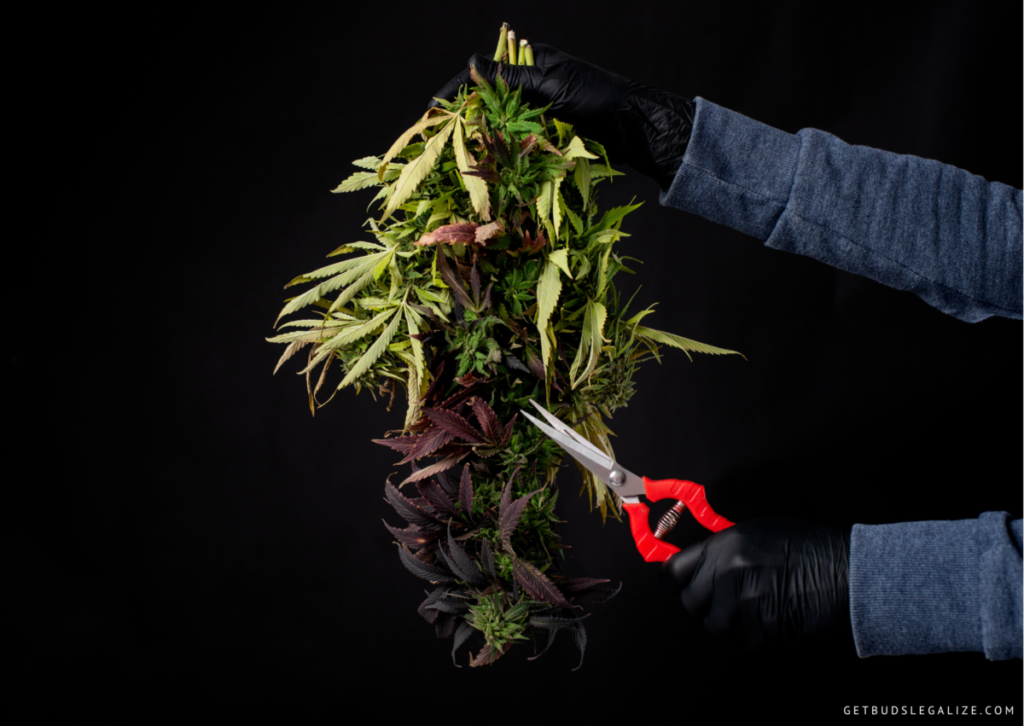
One of the most exciting and rewarding moments for any indoor cannabis grower is the time to harvest. After months of careful planning, preparation, and cultivation, you finally get to reap the fruits of your labor and enjoy the results of your hard work.
The first thing you need to know is that the optimal time to harvest depends on several factors, such as the strain, the growing conditions, and your personal preference.
Different strains have different flowering times, ranging from 6 to 12 weeks or more. Some strains are ready to harvest sooner than others, so you need to check the breeder’s information or consult with other growers who have experience with the same strain.
The growing conditions also affect the harvest time, as factors such as light, temperature, humidity, nutrients, and pests can influence the growth and development of your plants. Finally, your personal preference matters too, as different harvest times can result in different effects and flavors of your cannabis buds.
How to Know When Your Cannabis Plants Are Ready to Harvest
One of the most reliable ways to determine the best time to harvest is to look at the trichomes of your cannabis buds. Trichomes are tiny resin glands that cover the flowers and leaves of your plants, giving them a frosty appearance. They contain most of the cannabinoids and terpenes that are responsible for the potency and aroma of your cannabis. Trichomes change color as they mature, going from clear to cloudy to amber. You can use a magnifying glass or a microscope to observe them closely and decide when they are ready to harvest.
Generally speaking, clear trichomes indicate that your buds are still immature and need more time to ripen. Cloudy trichomes indicate that your buds are at their peak of potency and have a balanced ratio of THC and CBD. Amber trichomes indicate that your buds are overripe and have a higher percentage of CBD and CBN, which can result in a more sedative and couch-locking effect. Depending on what kind of effect you are looking for, you can choose to harvest when most of your trichomes are cloudy or when some of them have turned amber. A good rule of thumb is to harvest when about 70% of your trichomes are cloudy and 30% are amber.
Another way to determine the harvest time is to look at the pistils of your cannabis buds. Pistils are the hair-like structures that emerge from the calyxes of your flowers and collect pollen from male plants or pollen sacs. They also change color as they mature, going from white to orange to brown. You can use your eyes or a camera to observe them and decide when they are ready to harvest.
Generally speaking, white pistils indicate that your buds are still growing and need more time to develop. Orange pistils indicate that your buds are ripe and have reached their maximum size and weight. Brown pistils indicate that your buds are overripe and have started to degrade in quality and potency. Depending on what kind of quality you are looking for, you can choose to harvest when most of your pistils are orange or when some of them have turned brown. A good rule of thumb is to harvest when about 80% of your pistils are orange and 20% are brown.
How to Proceed:
Once you have decided that it is time to harvest your plants, you need to follow some steps to ensure a smooth and successful process. Here are some tips and tricks for harvesting your indoor cannabis crop:
- Stop feeding your plants any nutrients about one or two weeks before harvesting. This will help flush out any excess salts or chemicals from your plants and improve the taste and smoothness of your buds.
- Reduce the amount of water you give your plants in the last week before harvesting. This will help speed up the drying process and prevent mold or rot from forming on your buds.
- Cut off any large fan leaves from your plants a few days before harvesting. This will make it easier to trim and manicure your buds later on.
- Harvest your plants early in the morning or after a dark period. This will ensure that your plants have stored most of their sugars and starches in their roots and stem, leaving more cannabinoids and terpenes in their flowers.
- Cut off each branch from your plants carefully with a sharp pair of scissors or pruning shears. Avoid touching or squeezing your buds too much, as this can damage the trichomes and reduce their potency.
- Hang each branch upside down in a dark, cool, dry, and well-ventilated room for about 5 to 14 days. The ideal conditions for drying cannabis are 60-70°F (16-21°C) and 55-65% humidity. You can use a hygrometer to monitor the temperature and humidity levels in your drying room. You also need to ensure good air circulation in the room, but avoid direct airflow on the buds, as this can also speed up the drying process and affect the quality of your weed. You can use a fan or an exhaust system to create a gentle breeze in the room.
How to Know When My Buds Are Dry Enough? Drying and Curing:
The best way to check if your buds are dry enough is to bend one of the stems. If it snaps easily, it means the buds are ready for curing. If it bends without breaking, it means they need more time to dry. You don’t want to over-dry or under-dry your buds, as this can lead to mold, mildew, harsh smoke, or loss of potency.
After your buds are dry enough, you need to cure them in airtight containers for at least two weeks. Curing is a process that allows the buds to mature and develop their full flavor and potency. It also helps remove any remaining moisture and chlorophyll from the buds, making them smoother and more enjoyable to smoke. To cure your buds properly, you need to use glass jars with tight-fitting lids and fill them about ¾ full with your dried buds. You also need to burp your jars every day for the first week, which means opening them for a few minutes to let some fresh air in and some stale air out. This will prevent any mold or bacteria from growing in your jars. After the first week, you can burp your jars less frequently, maybe once every few days or once a week.
Curing can last from two weeks to six months or more, depending on how long you want to store your weed and how much flavor and potency you want to achieve. The longer you cure your buds, the better they will taste and smell, but there is also a point of diminishing returns where curing won’t make much difference anymore. Generally speaking, most growers cure their buds for at least a month before smoking them.
Drying and curing cannabis is an art that requires patience and attention to detail. If you follow these steps carefully, you will be rewarded with high-quality weed that will impress even the most discerning connoisseurs.
Challenges and Tips on How to Grow Cannabis Indoor
While growing cannabis indoors has many advantages, it also comes with some challenges that require attention and care. Some of the common issues that indoor growers face are:
- Cost: Growing cannabis indoors can be expensive, especially for beginners who need to invest in tools and equipment such as lights, fans, filters, pots, soil, nutrients, etc. Indoor growers also have to pay for electricity and water bills, which can add up over time.
- Space: Growing cannabis indoors requires space that is suitable for the plants’ needs. Indoor growers have to consider factors such as ventilation, lighting, temperature, humidity, and plant size when choosing a grow space. They also have to make sure that their grow space is safe and accessible for maintenance and harvesting.
- Maintenance: Growing cannabis indoors requires more maintenance than outdoor cultivation. Indoor growers have to monitor and adjust the environmental factors regularly to ensure optimal growth and health of their plants. They also have to prune, train, water, feed, and check their plants for any signs of stress or disease.
- Legal risks: Growing cannabis indoors may be illegal or restricted in some areas. Indoor growers have to be aware of the local laws and regulations regarding cannabis cultivation and consumption. They also have to be careful not to attract unwanted attention from neighbors or authorities.
To overcome these challenges, indoor growers can follow some tips such as:
- Start small: Indoor growers should start with a small number of plants that they can manage easily. They should also choose strains that are suitable for indoor cultivation, such as autoflowering or Indica-dominant varieties that are compact and fast-flowering.
- Do your research: Indoor growers should do their research before setting up their grow space and buying their tools and equipment. They should compare different options and prices and look for reviews and recommendations from other growers. They should also learn about the basics of cultivating cannabis indoors, such as germination, vegetative growth, flowering, harvesting, curing, etc.
- Be creative: Indoor growers can be creative with their grow space and use recycled or DIY materials to save money and space. For example, they can use old furniture, appliances, or boxes to create a grow box or a tent. They can also use LED lights or CFL bulbs instead of expensive HID lights.
- Be careful: Indoor growers should be careful with their grow operation and take precautions to avoid detection and trouble. They should use odor control methods such as carbon filters or air fresheners to mask the smell of their plants. They should also use timers or light-proof curtains to control the light cycle and prevent light leaks.
Conclusion
In conclusion, growing indoors can be a rewarding and enjoyable hobby, but it also requires some planning, preparation, and care. You need to choose the right strain, seeds, equipment, and environment for your plants, and follow the best practices for germination, vegetative growth, flowering, and harvesting. You also need to be aware of the legal risks and responsibilities involved in cultivating cannabis and respect the laws and regulations of your area.
By following this comprehensive guide on How to Grow Cannabis Indoors, you can grow healthy and potent cannabis plants and enjoy the fruits of your labor. Don’t forget to subscribe to our email newsletter, and follow us on our social media… Happy growing!
ILGM Fertilizer

- From seedling to harvest, give your plants everything they need.
- Enough for feeding at least 5 plants.
- Discounted Package Deal
- Works well in soil, hydroponics, and other growing mediums.
- The best way to treat your plants
ILGM Plant Protector

- Protect your cannabis from diseases and harmful pests.
- Contains three 20 ml bottles.
- Enough supplies to protect 20 plants.
- It can be used in soil, hydroponic, and all other growing mediums.

