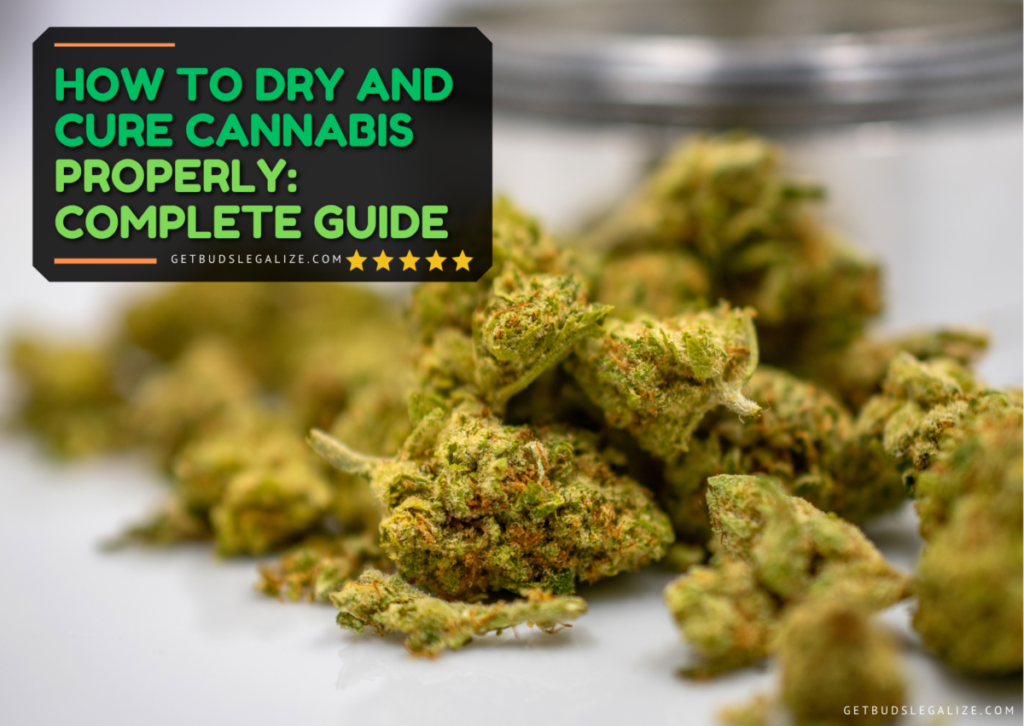
How to Dry and Cure Cannabis Properly: Complete Guide Step-by-Step
Drying and curing cannabis is a crucial step in the production of high-quality buds. Drying and curing cannabis are two related but distinct processes that aim to remove excess moisture from the harvested buds while preserving and enhancing their flavor, aroma, potency, smoothness, and shelf life. In this blog post, we will explain the benefits of drying and curing cannabis, and provide some tips and best practices for doing it properly.
Benefits of Drying Curing and Storage Cannabis Correctly
Properly drying, curing, and storing your cannabis cultivation is a crucial step in producing high-quality buds that will meet your expectations and needs. Some of the advantages are:
- Improved flavor: Drying and curing removes unpleasant tastes such as chlorophyll and grassiness, and enhances desirable ones such as sweetness and fruitiness.
- Improved aroma: Drying and curing preserve and develops terpenes and other aromatic compounds that give cannabis its distinctive smell. Terpenes are volatile molecules that can evaporate or degrade if exposed to heat, light, or oxygen.
- Improved potency: Drying and curing convert non-psychoactive cannabinoids such as THCA and CBDA into their active forms such as THC and CBD. This is because drying activates an enzyme called THCA synthase that catalyzes the decarboxylation of THCA into THC, while curing allows this reaction to continue at a slower rate.
- Improved smoothness: Drying and curing reduce harshness and irritation caused by excess moisture in the buds. Moisture can create steam when heated, which can burn your throat and lungs when you smoke cannabis.
- Improved shelf life: Drying and curing stabilizes cannabinoids and terpenes and prevents mold and mildew from growing on the buds. Mold and mildew can degrade cannabinoids and terpenes over time, reducing their quality and potency. They can also produce toxins that can harm your health if ingested or inhaled.
- It improves the appearance and texture of cannabis by preserving the shape, color, and density of the buds. Curing also prevents over-drying or crumbling of the buds, which can affect their weight and usability.
Drying Cannabis Process Step-by-Step
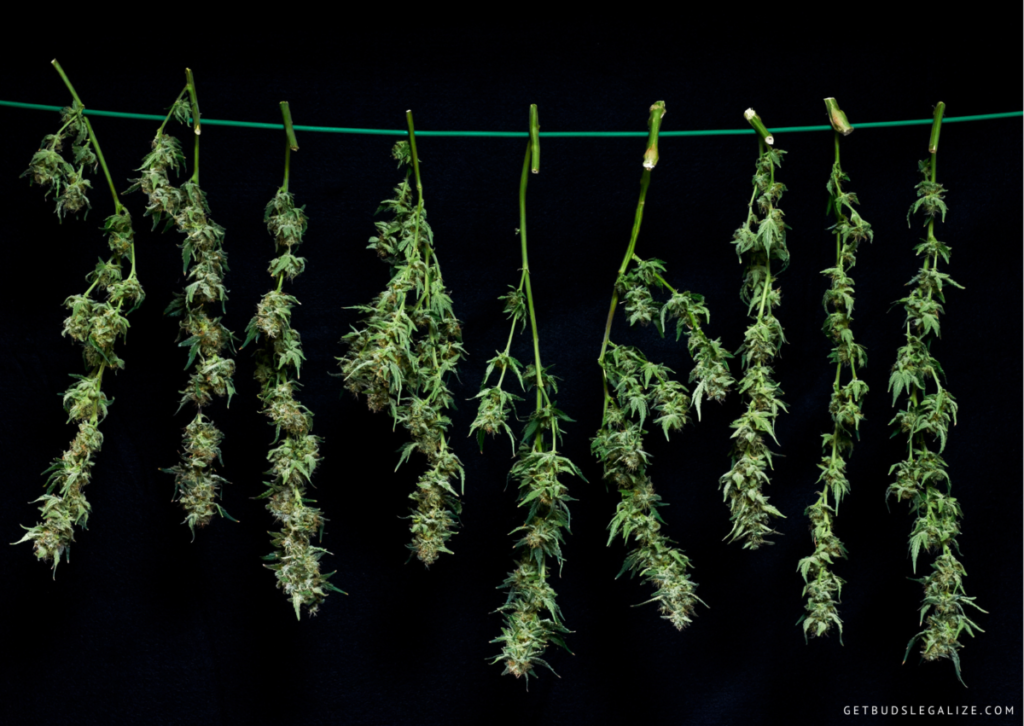
Drying cannabis is the process of reducing the moisture content of the harvested plants to make them ready for consumption or further processing. Drying cannabis prevents mold growth, extends shelf life, and improves the taste and potency of the buds. Drying cannabis usually involves hanging the plants or branches upside down in a dark, cool, and well-ventilated room with controlled temperature and humidity.
The Ideal Conditions for Drying Buds Are:
- Temperature: between 16°C and 21°C (60°F and 70°F)
- Humidity: between 55% and 65%
- Airflow: gentle but constant
- Light: minimal or none
The goal of drying cannabis is to remove about 60% of the water content from the plant material, without compromising the quality or integrity of the cannabinoids, terpenes, and other compounds that give cannabis its unique properties. Drying too fast or too slow can result in mold, mildew, loss of potency, harsh taste, and unpleasant smell.
To dry it properly, you need to monitor the moisture level of the buds by gently squeezing them between your fingers. They should feel dry on the outside, but still slightly sticky and springy on the inside. The stems should snap easily when bent, but not crumble.
How Long Does It Take to Dry Cannabis?
The drying time for cannabis varies from 5 to 14 days, depending on the size and density of the buds and stems, and whether you use the wet or dry trimming method. Wet trimming usually takes less time than dry trimming because most of the plant material is trimmed away first. To check if the buds are fully dry, bend a branch or stem and see if it snaps, or press down on the buds and feel if they are dry or moist.
The ideal moisture content for curing cannabis is around 10-12%, which means that the buds should be dry on the outside but still retain some moisture on the inside. You don’t want to over-dry your buds, as this will degrade the cannabinoids and terpenes that give cannabis its effects and aroma. You also don’t want to under-dry your buds, as this will increase the risk of mold and mildew growth during curing.
How to Set Up a Cannabis Drying Area
A Good room for drying cannabis should be dark, well-ventilated, and have a stable temperature and humidity level. The optimal conditions for drying cannabis are 60-70°F (16-21°C) and 55-65% relative humidity (RH). A cheap hygrometer can help you monitor these numbers.
Depending on your space and budget, you can use different types of rooms for drying cannabis, such as closets, cabinets, tents, boxes, or dedicated rooms. The main thing is to make sure that the room is clean, secure, and odor-proof. You may need to add some equipment to control the environment, such as fans, dehumidifiers, air conditioners, heaters, or carbon filters.
You should also avoid exposing your buds to direct sunlight, heat sources, or strong air currents, as these can damage the trichomes and cause uneven drying. You want to have a gentle airflow around your buds, but not blow directly on them.
Some of the Equipment and Tools Needed Are:
- Scissors or shears: To trim your buds before or after drying.
- Gloves: To protect your hands from resin and prevent contamination.
- Hangers or lines: To hang your branches or stems upside down for drying.
- Drying racks or screens: To lay your buds flat for drying.
- Paper bags or cardboard boxes: To store your buds temporarily if they are too dry or too moist.
- Hygrometers: To measure the temperature and humidity in your drying room.
How to Hang to Dry Buds
Hanging is one of the most popular methods of drying cannabis flowers because it is simple and effective. It allows the buds to dry evenly and slowly while retaining their shape and aroma.
Here are some steps to follow:
- Cut off whole branches or stems from your cannabis plants at harvest time. You can leave some fan leaves on to slow down the drying process if you live in a dry climate or remove them if you live in a humid climate.
- Trim off any excess leaves or stems that you don’t want in your final product. You can either do this before hanging or after hanging.
- Hang your branches or stems upside down on hangers or lines in your drying area. Make sure they are not touching each other or any walls or surfaces.
- Check on your buds every day and monitor the temperature and humidity in your drying room. Adjust accordingly if needed.
- Test your buds for dryness by bending a branch or stem. If it snaps easily, it is dry correctly and is ready for curing. If it bends without breaking, you’ll need to give it some extra time.
How to Dry Your Buds Without Hanging Them on a Line
If you want to dry your buds without hanging them on a line, you have several options to choose from. Each one has its own advantages and disadvantages, depending on your preferences and resources. Here are some of the most common methods:
Using racks or screens: This is a method that involves placing your buds on racks or screens in a well-ventilated area. You can use it by arranging your buds in a single layer and exposing them to air circulation and low humidity. This method is slower than the others, but it preserves most of the flavor and potency of your buds. It also does not require any special equipment or electricity. However, it can also expose your buds to dust, mold, insects, or other contaminants that may affect their quality.
Using a dehydrator: This is a device that uses hot air to remove moisture from food or herbs. You can use it to dry your buds by placing them on trays and setting the temperature between 35 and 45°C (95 and 115°F). This method is faster than hanging them on a line, but it still preserves most of their quality. However, it can also reduce some of the terpenes and cannabinoids that give your buds their flavor and potency. You also need to buy a dehydrator, which can be expensive.
Using an oven: This is a method that involves baking your buds in a low-temperature oven for a few hours. You can use it by spreading your buds on a baking sheet and setting the oven to 65°C (150°F). This method is also faster than hanging them on a line, but it can degrade some of the quality and potency of your buds. It can also make your house smell like weed, which may not be desirable if you have neighbors or visitors.
Using a microwave: This is another way to dry buds quickly without using an oven. You can use it by placing your buds on a paper towel and microwaving them for 10 seconds at a time until they are dry enough. This method is similar to using an oven, but it exposes your buds to less heat and time. However, it can also damage some of the essential oils and compounds that make your buds unique. You also need to be careful not to overheat or burn your buds, which can ruin their taste and smell.
Using a paper bag: This is a faster method that can be used outdoors or indoors, but it may result in uneven drying and loss of flavor. You need to place a handful of buds inside brown paper bags, hang them horizontally in a windy area, and leave them for 2-3 days until they are almost completely dry
Curing Process Step-by-Step
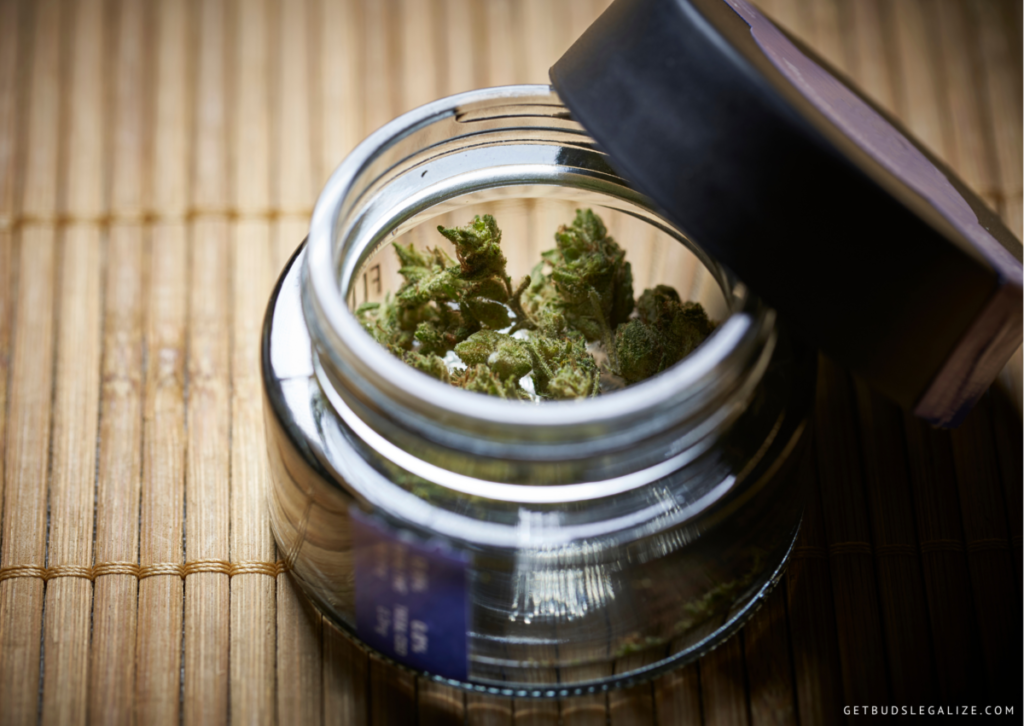
The Curing process is the second stage of the post-harvest process. It involves storing the dried buds in airtight containers, such as glass jars or plastic bags, and opening them periodically to allow fresh air to circulate.
The Ideal Conditions for Curing Cannabis Are:
- Temperature: between 16°C and 21°C (60°F and 70°F)
- Humidity: between 55% and 65%
- Airflow: intermittent
- Light: minimal or none
The goal of curing cannabis is to further reduce the moisture level of the buds to about 10% to 12% while allowing the chemical reactions that enhance the quality of the buds to take place.
Curing improves the flavor, aroma, potency, and smoothness of the smoke by:
- Breaking down chlorophyll and other plant sugars that cause a grassy or hay-like taste.
- Preserving and developing terpenes and other aromatic compounds that give cannabis its distinctive smell.
- Converting non-psychoactive cannabinoids, such as THCA and CBDA, into their active forms, such as THC and CBD
- Decarboxylating cannabinoids, which makes them more bioavailable and effective.
- Stabilizing cannabinoids and terpenes, which prevents them from degrading over time.
How Long Does It Take to Cure Marijuana?
The duration of curing marijuana depends on several factors, such as the strain, the size and density of the buds, the humidity and temperature of the storage environment, and the personal preference of the grower or consumer. However, a general rule of thumb is that curing should take at least three weeks, and ideally longer, for optimal results.
Some sources suggest that curing cannabis for two to four weeks is sufficient, while others recommend curing for up to six months or more. The longer the curing period, the more complex and refined the flavor and aroma of the buds will become.
Some of the Equipment and Tools Needed for the Curing Process Are:
- Glass Mason jars or airtight and opaque containers. These are used to store dry marijuana and prevent light, moisture, and oxygen from degrading them. The containers should be large enough to fill up to 75% with buds, leaving some space for air circulation.
- Hygrometer. This is a device that measures the relative humidity inside the containers. A hygrometer can help to monitor the moisture level of the buds and prevent mold growth or overdrying.
- Humidity pack. This is an optional tool that can help to regulate the humidity inside the containers. A humidity pack is a small sachet that contains a salt solution that absorbs or releases moisture depending on the ambient conditions. A humidity pack can help to maintain a consistent humidity level and prevent fluctuations that can affect the quality of the buds.
To Curing Cannabis Properly, It Is Important to Follow Some Basic Steps:
- Dry the harvested buds until they are crisp on the outside but still slightly moist on the inside. This usually takes about a week, depending on the climate and method of drying.
- Trim the dried buds to remove any excess leaves and stems. You can either trim before or after drying, depending on your preference.
- Place the trimmed buds in glass jars that are about two-thirds full. Do not pack them too tightly or loosely. Seal the jars tightly and store them in a dark, cool, and dry place.
- Open the jars once or twice a day for 15 to 30 minutes to release any moisture and gases that may have accumulated. This is called burping and it prevents mold and mildew from forming on the buds.
- Check the buds for any signs of mold or spoilage. If you notice any white fuzz, black spots, or musty smell, discard the affected buds immediately.
- Repeat this process until the buds are fully cured. You can test the buds by smoking or vaping them to see if they have reached your desired quality. The curing time depends on your personal preference and the strain of cannabis you are curing. Generally speaking, it can take 2 to 8 weeks to cure cannabis properly.
Curing buds is an art that requires patience and attention to detail. By following these steps, you can enjoy a smooth, flavorful, and potent cannabis experience that will reward your efforts.
How to Store Correctly Your Cured Cannabis Buds
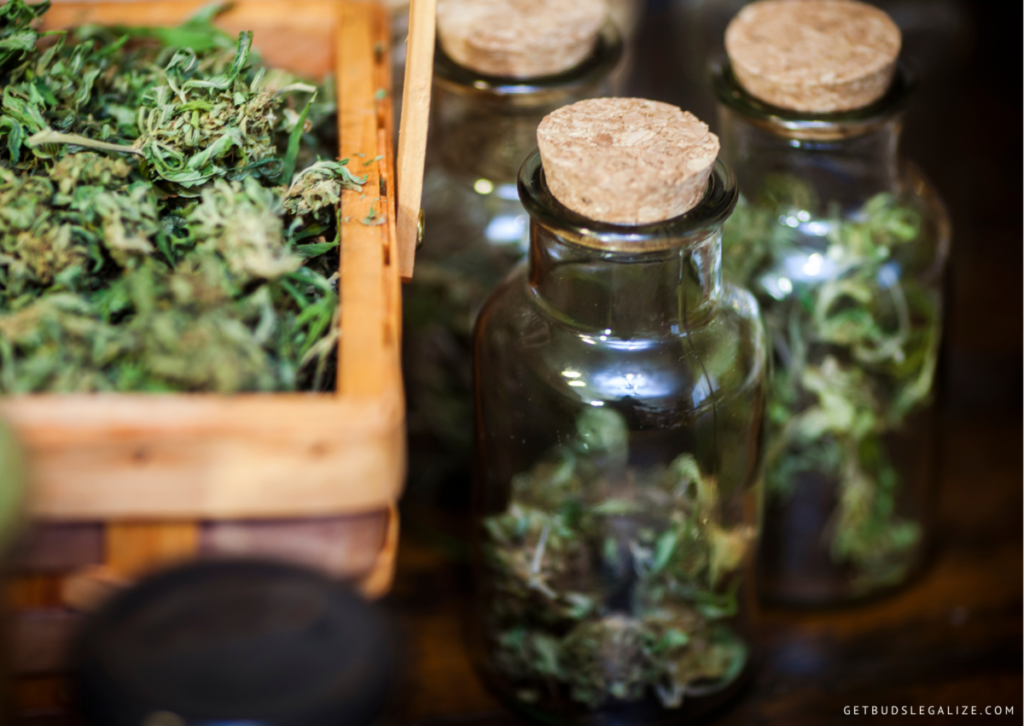
The ideal storage conditions for cannabis buds are cool, dark, and dry. Here are some tips on how to store your harvested cannabis buds properly:
- Use air-tight glass jars. Glass jars are the best way to store cannabis buds because they prevent moisture, air, and light from affecting the quality of your flowers. Choose a jar size that fits your buds snugly without crushing them or leaving too much space for oxygen. You can also use dark-colored jars or store them in a cool, dark place to protect them from sunlight, which can degrade cannabinoids and terpenes.
- Maintain optimal humidity levels. Humidity is a key factor in preserving cannabis buds. Too much humidity can cause mold and mildew to grow on your buds, while too little humidity can make them dry and brittle. The ideal humidity range for storing cannabis buds is between 55% and 65%. You can use a hygrometer to monitor the humidity level in your jars and adjust it with humidipacks or other methods if needed.
- Avoid extreme temperatures. Temperature also affects the quality of cannabis buds. High temperatures can cause your buds to lose their aroma and potency, while low temperatures can affect their texture and color. The ideal temperature range for storing cannabis buds is between 60°F and 70°F. Avoid storing your buds near heat sources, such as radiators or ovens, or in freezing conditions, such as refrigerators or freezers.
- Label your jars. If you have different strains or batches of cannabis buds, it is a good idea to label your jars with the name, date, and other relevant information. This will help you keep track of your inventory and avoid confusion or mix-ups. You can also write down the effects, flavors, and aromas of each strain to help you choose the best one for your needs.
Challenges of Drying and Curing Cannabis
However, drying and curing cannabis also comes with some challenges that require attention and care. Some of the challenges of drying and curing cannabis are:
Mold and Mildew:
Excess moisture can cause fungal growth that can ruin your buds. Mold and mildew thrive in warm, humid, and dark conditions, which are similar to those needed for drying cannabis. To prevent mold and mildew from forming on your buds during drying, you need to monitor the temperature, humidity, airflow, and light levels in your drying area, and adjust them accordingly.
Overdrying:
On the other hand, if you dry your buds too quickly or too much, you can lose some of the essential oils and aromas that make your cannabis unique and enjoyable. Overdrying can also make your buds brittle and crumbly, which can affect their appearance and texture. To avoid overdrying your buds, you need to check them regularly for signs of dryness, such as snapping stems, crispy leaves, and loose trichomes. You also need to avoid using heat sources or fans that can speed up the drying process and cause uneven drying.
Tips and Best Practices To Follow:
Drying and curing cannabis is not a complicated process, but it requires some patience and attention to detail. Here are some tips and best practices to follow:
- Choose a suitable location for drying and curing: The ideal conditions are a dark, cool, dry, and well-ventilated space that is free of dust, pests, and odors. Avoid direct sunlight, heat sources, humidifiers, or dehumidifiers that can alter the temperature or humidity levels. A closet, a cabinet, or a cardboard box can work well as a drying or curing chamber.
- Trim the buds before drying: Trimming removes the excess leaves and stems that can affect the quality of the buds. You can either trim wet (right after harvesting) or dry (after drying), depending on your preference. Wet-trimming is easier and faster, but it can cause more damage to the trichomes (the resin glands that contain cannabinoids and terpenes). Dry-trimming is more gentle and preserves more trichomes, but it can be more tedious and messy.
- Hang the buds upside down or lay them on a rack for drying: Hanging the buds upside down allows gravity to pull the moisture out of the stems while laying them on a rack allows air to circulate around them. Either way, make sure to space the buds evenly and avoid overcrowding them, as this can slow down the drying process and increase the risk of mold.
- Place the buds in an airtight container for curing: Glass jars with lids are ideal for curing cannabis, as they are easy to seal, monitor, and burp (open briefly to release excess moisture and gases). You can also use plastic bags or containers, but make sure they are clean and odorless.
- Burp the jars or bags daily for the first week or two of curing: Burping involves opening the jars or bags for 10 to 15 minutes every day to let out any excess moisture or gases that may have accumulated inside. This prevents mold growth, reduces harshness, and improves the flavor.
- Continue curing for at least two to four weeks for optimal results: The longer you cure your cannabis, the better it will get in terms of potency, flavor, and smoothness. However, you don’t need to burp as often after the first week or two of curing. You can reduce the frequency to once every few days or once a week as long as there is no sign of mold or excessive moisture in your jars or bags.
Drying and Curing Weed FAQ
One method is to use a microwave oven. Place your buds on a paper towel and microwave them for 10 seconds at a time, flipping them over after each interval. Be careful not to overheat or burn your buds, as this will ruin them. Another method is to use a food dehydrator. Set the temperature to the lowest setting and spread your buds evenly on the trays. Check them every hour and remove them when they are dry and crispy. This method can take several hours, depending on the size and moisture of your buds.
The optimal humidity level to maintain before curing is between 55% and 65%. This range allows the buds to dry slowly and evenly, preserving their flavor, aroma, and potency. If the humidity is too high, the buds may develop mold or mildew. If the humidity is too low, the buds may dry too fast and lose their terpenes and cannabinoids.
buds should not be completely dry before curing, as this can result in harsh and brittle buds that lose their aroma and potency. Ideally, buds should have a moisture content of around 10-15% before curing, which can be achieved by drying them for about 5-10 days in a dark and well-ventilated room with a temperature of 16-21°C and relative humidity of 55-65%.
There are several methods to dry your buds quickly, but they may affect the taste and potency of your cannabis. Here are some of the most common methods:
- Brown paper bags: Place your buds inside paper bags and hang them in a windy area outdoors. Leave them for 2-3 days to dry out your buds.
- Oven, microwave, or food dehydrator: Trim your buds and lay them on a baking sheet inside your oven, microwave, or food dehydrator. Use low heat settings and check your buds every 10 seconds until they are dry enough for breaking up.
Burping weed is a term that refers to the process of opening and closing the containers of cannabis buds during the curing stage. This allows the excess moisture and gases to escape, preventing mold and improving the flavor and potency of the weed. Burping weed is usually done for a few minutes every day for several weeks until the buds are fully cured and ready for consumption.
Burping weed is the process of opening the jars that contain the dried cannabis buds and letting them air out for a few minutes. This helps to release the excess moisture and carbon dioxide that build up during the curing process. Burping weed is important because it prevents mold growth, improves the flavor and aroma, and preserves the potency of the buds. Burping weed should be done regularly for the first few weeks of curing, and then less frequently as the buds reach their optimal humidity level.
Curing is the process of storing your harvested weed in airtight containers for several weeks or months. This allows the moisture and chlorophyll to evaporate slowly, enhancing the flavor, aroma, and potency of your weed. Curing also reduces the harshness and improves the smoothness of your smoke. Therefore, yes, your weed will taste better after curing, as long as you do it properly and avoid mold or over-drying.
Drying cannabis with a fan is not recommended, as it can cause the buds to lose their flavor, aroma, and potency. A fan can also create uneven drying, resulting in mold or overdrying. The best way to dry is to hang it upside down in a dark, cool, and well-ventilated room for about 10 to 14 days. This will allow the moisture to evaporate slowly and evenly, preserving the quality and integrity of the buds.
Drying and curing are essential steps to preserve the quality, flavor, and potency of the buds. The best practices for drying and curing involve controlling the temperature, humidity, airflow, and lighting of the environment. Ideally, the drying area should be dark, with temperatures between 60-70°F and humidity between 55-65%. The buds should be hung upside down or placed on a drying rack until they snap when bent. Curing requires transferring the dried buds to airtight jars and storing them in a cool, dark place. The jars should be opened and inspected at least once a day to release excess moisture and prevent mold. Drying and curing cannabis can take from two weeks to several months, depending on the desired outcome.
A good way to tell if cannabis is dry enough for curing is to bend the stems. If they snap easily, the buds are ready for curing. If they bend without breaking, they need more time to dry. Ideally, cannabis should have a moisture content of around 10-15% before curing.
Drying and curing at home is a process that requires patience and care. Drying is the first step, which involves removing most of the moisture from the buds. This can be done by hanging them upside down in a dark, well-ventilated room with a temperature of around 16-21°C and a humidity of 55-65%. Drying can take from a few days to a few weeks, depending on the size and density of the buds. The buds are ready for curing when the stems snap easily.
Curing is the second step, which involves storing the buds in airtight containers such as glass jars or plastic bags. This allows the buds to develop their full flavor and potency by breaking down chlorophyll and other unwanted compounds. The curing process can take from a few weeks to a few months, depending on the preference of the user. The containers should be opened once or twice a day for the first week to release any excess moisture and prevent mold. The buds are ready for consumption when they have a smooth and pleasant smell and taste.

