Ultimate Guide: How to Build a Recirculating DWC System for Optimal Cannabis Cultivation
Cannabis cultivation has come a long way, with hydroponic systems like Deep Water Culture systems (DWC) becoming increasingly popular among growers. RDWC systems offer several advantages, including faster growth rates, higher yields, and better nutrient management. This comprehensive guide will walk you through the process of building your own RDWC system, ensuring that your cannabis plants thrive in a controlled and nutrient-rich environment.
What is RDWC?
RDWC is an advanced variation of the traditional Deep Water Culture (DWC) hydroponic system. It combines the core principles of DWC with a recirculation system to enhance efficiency and plant growth. RDWC systems are designed to optimize nutrient and oxygen delivery, making them particularly effective for large-scale or high-yield cultivation.
Key Benefits of RDWC for Cannabis Cultivation
Implementing a RDWC system offers several significant advantages for cannabis growers. Here’s a summary of the key benefits that make RDWC an exceptional choice for cultivating high-quality cannabis:
- Faster Growth Rates: The continuous supply of oxygen and nutrients promotes rapid root development and faster vegetative and flowering phases.
- Higher Yields: Optimal nutrient delivery and oxygenation result in robust plant growth and higher yields.
- Consistent Nutrient Levels: The recirculation system maintains uniform nutrient concentration and pH levels across all plant sites.
- Reduced Risk of Root Diseases: Proper oxygenation helps prevent root rot and other waterborne diseases..
Essential Materials Needed for Building an RDWC System
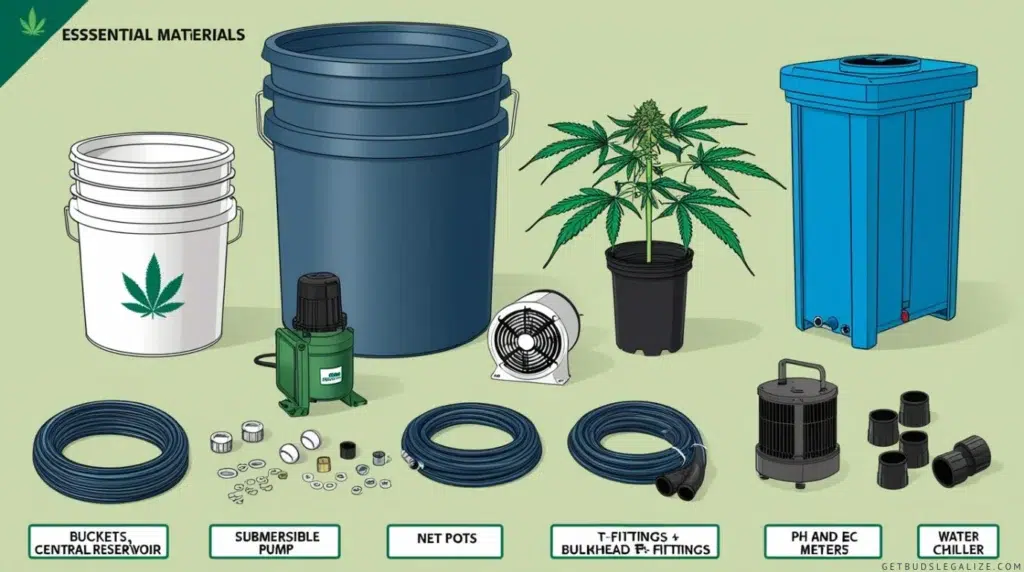
1. Containers and Reservoir:
- Buckets (3-5 gallons each, one per plant site)
- Central Reservoir (a larger container, such as a 20-gallon tote)
- Net Pots (fit into the bucket lids)
2. Plumbing and Hardware:
- Submersible Pump (for water circulation)
- Air Pump (for oxygenation)
- Air Stones (one for each bucket and the reservoir)
- Airline Tubing (for connecting air pump to air stones)
- PVC or Vinyl Tubing (for connecting buckets to the reservoir)
- T-fittings and Elbows (for connecting tubing)
- Bulkhead Fittings or Uniseals (for watertight connections between buckets and reservoir)
- Water Chiller (optional, to maintain water temperature)
- Hose Clamps (to secure tubing connections)
3. Nutrients and Supplements:
- Hydroponic Nutrients (specific for cannabis)
- pH Up and Down Solutions
- pH and EC Meter (to monitor nutrient solution)
4. Tools:
- Drill and Hole Saws (to make holes for fittings and net pots)
- Measuring Tape
- Marker
Step-by-Step Guide: Building Your RDWC System
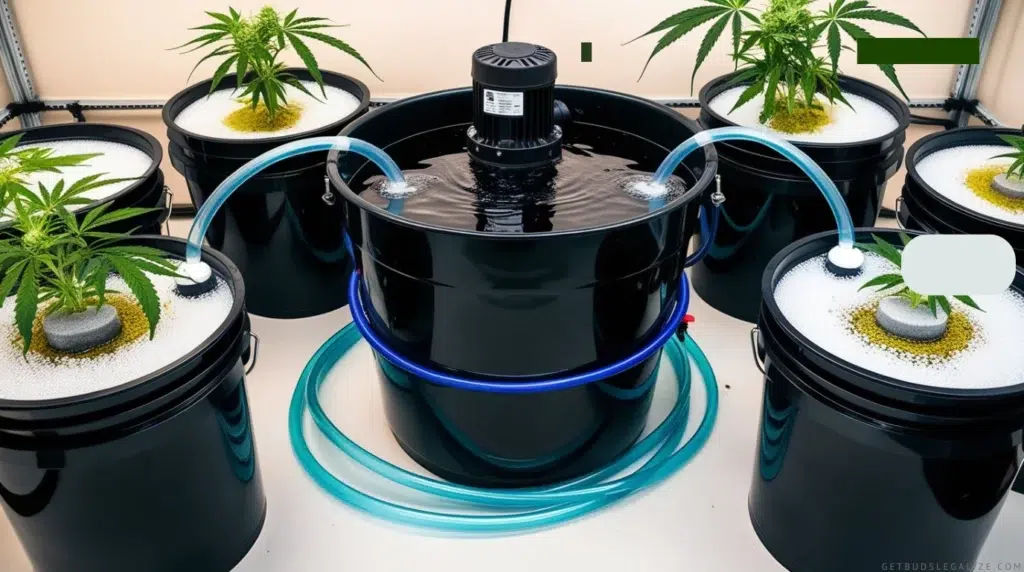
Step 1: Plan Your Layout
The first step in building your RDWC hydroponic system is planning your layout. Decide how many plant sites you want and arrange your buckets and central reservoir accordingly. Ensure there’s enough space between buckets for plant growth and maintenance.
Step 2: Prepare the Buckets
- Drill Holes for Net Pots: Use a hole saw to cut holes in the bucket lids to fit the net pots. These pots will hold your plants and growing medium.
- Drill Holes for Plumbing: Drill holes near the bottom of each bucket for the bulkhead fittings or uniseals. These holes will connect the buckets to the central reservoir, allowing nutrient solution to circulate.
Step 3: Install Bulkhead Fittings
- Insert Bulkhead Fittings: Insert bulkhead fittings into the holes you drilled at the bottom of the buckets. Ensure they are watertight to prevent leaks.
- Connect Tubing: Cut lengths of PVC or vinyl tubing to connect each bucket to the central reservoir. Use T-fittings and elbows as needed to create a loop system that ensures even distribution of the nutrient solution.
Step 4: Set Up the Central Reservoir
- Position the Reservoir: Place the central reservoir slightly elevated compared to the plant sites to facilitate gravity return of the nutrient solution.
- Drill Holes for Plumbing: Drill holes in the reservoir for the bulkhead fittings to connect it to the buckets.
- Install Bulkhead Fittings: Insert bulkhead fittings into the reservoir holes and connect the tubing from the buckets.
Step 5: Install the Submersible Pump
- Place the Pump: Position the submersible pump in the central reservoir.
- Connect Tubing: Attach tubing to the pump’s outlet and connect it to the first bucket in the series. This will circulate the nutrient solution from the reservoir to the plant sites, ensuring even distribution.
Step 6: Set Up the Air System
- Install Air Stones: Place an air stone in each bucket and the central reservoir. These stones will diffuse oxygen into the nutrient solution, promoting healthy root growth.
- Connect Air Tubing: Use airline tubing to connect the air stones to the air pump. Ensure the tubing is secure and there are no kinks that could restrict airflow.
Step 7: Fill the System with Nutrient Solution
- Fill the Reservoir: Start by filling the central reservoir with water, then add hydroponic nutrients as directed by the manufacturer. This nutrient solution should contain all the essential elements needed for healthy cannabis growth.
- Check pH and EC: Utilize a pH meter and EC meter to verify that the nutrient solution is within the ideal ranges. Cannabis plants flourish at a pH of 5.5 to 6.5 and an EC suitable for their current growth stage. Make any necessary adjustments using pH up or down solutions.
Step 8: Test the System
- Power Up the Pumps: Activate the submersible pump and the air pump. Verify that the nutrient solution is circulating effectively throughout the system and that the air stones are generating bubbles.
- Check for Leaks: Carefully inspect all connections for any leaks. Make any necessary adjustments to ensure that the system is completely watertight.
Expert Tips for Successful RDWC Cultivation
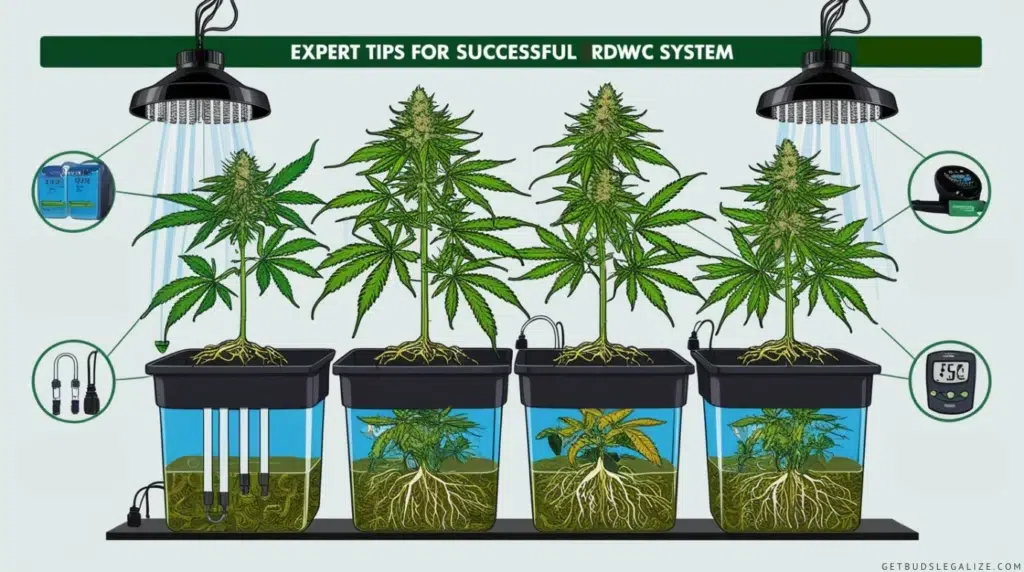
To maximize the benefits of your RDWC system and achieve optimal cannabis growth, consider these expert tips. Each step ensures that your plants receive the best care and environment for thriving in your hydroponic setup.
- Oxygenation: Ensure your air pump is powerful enough to provide sufficient oxygen to all the buckets. Well-oxygenated roots are less susceptible to diseases and grow more vigorously.
- Cleanliness: Keep your system clean to prevent algae growth and root diseases. Regularly clean and disinfect the buckets, tubing, and reservoir.
- Light Management: Ensure proper lighting for your cannabis plants, adjusting height and intensity as they grow. Cannabis plants require intense light for optimal growth, particularly during the flowering stage.
- Monitoring: Regularly check the health of your plants, roots, and the nutrient solution to catch any issues early. Prompt intervention can prevent minor problems from escalating.
Common Issues and Troubleshooting RDWC Systems
Even with the best setup, RDWC systems can encounter issues. Here’s a guide to common problems and how to address them effectively to keep your cannabis plants healthy and thriving.
- pH Fluctuations: Regularly monitor and adjust the pH of the nutrient solution. Sudden changes can indicate problems with the water source or nutrient mix. Use pH up/down solutions to stabilize levels. Consistent pH management is critical for nutrient uptake and plant health.
- Root Problems: Check the roots regularly for signs of rot or discoloration. Healthy roots should be white or light tan and free of slime. Use beneficial bacteria and enzymes to promote root health. Root rot can be prevented by maintaining proper oxygenation and temperature.
- Slow Growth: If plants are growing slowly, check the nutrient levels, light intensity, and environmental conditions. Adjust as necessary to optimize growth. Ensure that plants receive adequate light, nutrients, and environmental stability.
- Pests and Diseases: Keep an eye out for common pests like spider mites, aphids, and fungus gnats. Use organic insecticides, beneficial insects, or sticky traps to control infestations. Regularly inspect plants for signs of pests and treat them promptly.
Conclusion: Maximizing Yields with RDWC Systems
Building an RDWC system for cannabis cultivation offers faster growth and higher yields compared to traditional soil methods. Learning how to build a recirculating DWC system is crucial for achieving these results. By mastering the basics, selecting the right strain, managing nutrients, and maintaining optimal conditions, you can grow healthy, potent cannabis.
Regular monitoring and timely adjustments will ensure success. Whether you’re new to hydroponic gardening or experienced, RDWC provides an efficient way to boost growth and yields. Follow this guide to build a successful RDWC system and enjoy a fruitful harvest. Happy growing!
FAQS about How to Build a Recirculating DWC System
An RDWC system is a type of hydroponic growing setup where plant roots are suspended in a nutrient-rich, oxygenated water solution. Unlike traditional DWC systems, RDWC continuously recirculates the nutrient solution through multiple buckets connected to a central reservoir, ensuring consistent nutrient levels and oxygenation across all plant sites.
To build an RDWC system, you will need:
- Buckets (3-5 gallons each, one per plant site)
- A central reservoir (larger container, such as a 20-gallon tote)
- Net pots
- Submersible pump (for water circulation)
- Air pump (for oxygenation)
- Air stones (one for each bucket and the reservoir)
- Airline tubing
- PVC or vinyl tubing (for connecting buckets to the reservoir)
- T-fittings and elbows
- Bulkhead fittings or uniseals
- Hydroponic nutrients
- pH up and down solutions
- pH and EC meter
- Drill and hole saws
- Water chiller (optional)
An RDWC system works by continuously circulating a nutrient-rich solution from a central reservoir through multiple grow buckets. The solution is pumped from the reservoir to the plant sites, where it flows over the roots and is then returned to the reservoir. Air stones in each bucket oxygenate the solution, ensuring that the roots receive plenty of oxygen.
RDWC systems offer several advantages over traditional soil growing, including:
- Faster growth rates
- Higher yields
- Consistent nutrient delivery
- Better oxygenation
- Reduced risk of soil-borne diseases and pests
Typically, 3-5 gallon buckets are used for each plant site, and a larger central reservoir, such as a 20-gallon tote, is used to hold and recirculate the nutrient solution. The size of the reservoir can be adjusted based on the number of plant sites and the overall system volume.
- Use Bulkhead Fittings or Uniseals: Install bulkhead fittings or uniseals to create secure, watertight connections between the buckets and the reservoir.
- Tighten Connections: Ensure that all connections are tightened securely to prevent any leaks. Use appropriate tools if necessary.
- Seal Gaps: Check for any gaps or openings and apply sealant as needed to reinforce the connections.
- Regularly Inspect for Leaks: Conduct routine checks for leaks throughout the system, especially after initial setup and after any adjustments.
- Make Adjustments: If you notice any leaks, promptly make the necessary adjustments to maintain a watertight system.
You will need a submersible pump to circulate the nutrient solution from the central reservoir to the plant sites. The pump should be powerful enough to handle the volume of your system and maintain a consistent flow rate.
Install air stones in each bucket and the central reservoir. Connect these air stones to a powerful air pump using airline tubing. The air stones will diffuse oxygen into the nutrient solution, promoting healthy root growth and preventing root rot.
Use hydroponic nutrients specifically formulated for cannabis. These nutrients should provide all the essential elements required for plant growth. Follow the manufacturer’s instructions for mixing and adjusting nutrient levels.
Use a pH meter and an EC meter to regularly monitor the pH and electrical conductivity (EC) of the nutrient solution. The ideal pH range for cannabis is between 5.5 and 6.5. Adjust pH levels using pH up or down solutions as needed. EC levels should be adjusted based on the growth stage of the plants, following the nutrient manufacturer’s guidelines.
It is generally recommended to change the nutrient solution every 1-2 weeks to prevent the buildup of salts and contaminants. Regular changes ensure that your plants receive a fresh and balanced nutrient supply.
Maintaining a water temperature between 65-75°F (18-24°C) is crucial for healthy root growth. If your water temperature tends to rise, consider using a water chiller to keep it within the optimal range.
Yes, while RDWC systems are excellent for growing cannabis, they can also be used to cultivate other plants that thrive in hydroponic environments, such as leafy greens, herbs, and certain vegetables.
1. pH Fluctuations:
- Symptoms: Frequent changes in pH levels can indicate issues with the water source or nutrient mix.
- Solution: Regularly monitor and adjust the pH using appropriate pH up or down solutions. Ensure your water source is stable and test the nutrient mix before adding it to the system.
2. Root Problems:
- Symptoms: Look for signs of root rot or discoloration. Healthy roots should be white or light tan.
- Solution: If you find unhealthy roots, consider increasing aeration, reducing nutrient concentration, or using a beneficial root treatment. Ensure that the water temperature is optimal, as high temperatures can contribute to root issues.
3. Slow Growth:
- Symptoms: Stunted or slow growth can indicate nutrient deficiencies or environmental stress.
- Solution: Check nutrient levels and adjust as needed. Ensure that light intensity is appropriate for your plants’ growth stage and monitor environmental conditions (temperature, humidity, airflow) to provide optimal growing conditions.
4. Pests and Diseases:
- Symptoms: Look for common pests such as spider mites, aphids, and fungus gnats.
- Solution: Regularly inspect plants for signs of infestation. Use organic insecticides or introduce beneficial insects to help control pest populations. Maintain good hygiene in the grow area to prevent diseases.
The initial setup costs for an RDWC system may be higher than those for soil growing, primarily due to the specialized equipment required. However, the faster growth rates and higher yields associated with RDWC systems can make it a cost-effective choice over time.
By grasping the fundamentals of RDWC systems and adhering to best practices for setup and maintenance, you can establish a highly efficient and productive hydroponic environment for your cannabis plants.
To build a recirculating Deep Water Culture (DWC) system, follow these steps:
1. Gather Materials
- Reservoir: Container for holding the nutrient solution
- Air Pump and Air Stones: For oxygenating the water
- Water Pump: For recirculating the nutrient solution
- Net Pots: To support the plants
- Growing Medium: (e.g., clay pebbles, rock wool)
- Hydroponic Nutrients
- pH and EC Meters: For monitoring nutrient levels
- Tubing: For water and air delivery
- Drill and Hole Saw: To cut holes in the reservoir lid
- pH Adjusters: To maintain the correct pH levels
2. Prepare the Reservoir
- Choose a suitable reservoir size based on your plant needs.
- Clean the reservoir thoroughly before use.
3. Install Air Pump and Air Stones
- Place air stones at the bottom of the reservoir to provide oxygen to the nutrient solution.
- Connect the air stones to the air pump using tubing.
4. Set Up the Water Pump
- Install the water pump in the reservoir.
- Attach tubing from the water pump to the plant area to circulate the nutrient solution.
5. Prepare and Install Net Pots
- Cut holes in the reservoir lid to fit the net pots securely.
- Fill net pots with your growing medium.
- Insert seedlings or clones into the net pots, ensuring roots can reach the nutrient solution.
6. Set Up Recirculation System
- Connect tubing from the water pump to the net pots or a drip system to deliver the nutrient solution to the plants.
- Ensure that the system allows the solution to drain back into the reservoir.
7. Mix Nutrient Solution
- Fill the reservoir with water.
- Add hydroponic nutrients according to the manufacturer’s instructions.
- Use pH and EC meters to measure and adjust the nutrient solution to the desired levels.
8. Monitor and Maintain
- Regularly check and adjust the pH and EC levels of the nutrient solution to ensure optimal conditions.
- Confirm that both the air pump and water pump are operating effectively.
- Utilize a level indicator to keep track of the reservoir’s water level.
- Refill the reservoir with water and nutrients as necessary to maintain the proper balance.
By following these steps, you can set up a recirculating DWC system that promotes efficient nutrient uptake and healthy plant growth.
ILGM Fertilizer

- From seedling to harvest, give your plants everything they need.
- Enough for feeding at least 5 plants.
- Discounted Package Deal
- Works well in soil, hydroponics, and other growing mediums.
- The best way to treat your plants
ILGM Plant Protector
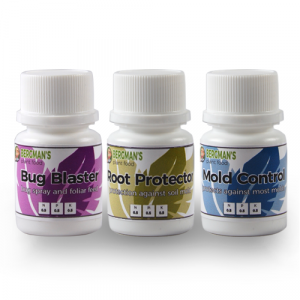
- Protect your cannabis from diseases and harmful pests.
- Contains three 20 ml bottles.
- Enough supplies to protect 20 plants.
- It can be used in soil, hydroponic, and all other growing mediums.


