Cannabis Flowering Stage Week by Week Guide: Maximize Bud Size, THC, and Yields
The flowering stage is where your cannabis grow transforms from green growth to sticky, trichome-laced buds. This is the make-or-break phase—mastering each week means bigger yields, more THC, and tastier flower.
In this week-by-week flowering guide, you’ll learn exactly what to do from the stretch to the harvest flush. Whether you’re indoors or outdoors, growing photoperiod or autoflowers, we’ve got you covered.
What Is the Cannabis Flowering Stage?
The cannabis flowering stage is the final phase of growth, during which your plant stops focusing on leaf and stem development and instead channels all its energy into producing buds. This stage is triggered by changes in light exposure, typically when the plant receives 10–12 hours of uninterrupted darkness per day.
For outdoor growers, flowering begins when daylight naturally decreases in late summer or early autumn. For indoor growers, it begins when you switch your grow lights from an 18/6 light cycle to a 12/12 schedule. This mimics seasonal light changes and signals the plant to begin reproduction.
Flowering lasts about 7 to 10 weeks, depending on strain:
- Indicas mature faster (7–9 weeks).
- Sativas take longer (10+ weeks).
- Hybrids fall somewhere in between.
Weekly Cannabis Flowering Summary Chart
| Week | Growth Phase | Visible Changes | Key Actions |
| 1 | Early Stretch | Rapid vertical growth | Begin LST, transition to bloom feed |
| 2 | Pre-Flower | White pistils appear | Sex plants, adjust lighting spectrum |
| 3 | Bud Sites Form | Stretch slows, budlets form | Light defoliation, monitor nutrients |
| 4 | Bud Stacking Begins | Trichomes start forming | Add PK boosters, avoid pruning |
| 5 | Peak Flowering | Buds swell, aroma strong | Support branches, monitor EC/PPM |
| 6 | Ripening | Trichomes cloudy | Start harvest prep, avoid stress |
| 7 | Flushing | Pistils darken | Water only, watch trichomes closely |
| 8+ | Final Ripening | Amber trichomes appear | Harvest when 10–30% amber |
Weeks 1–3: Early Flowering (Stretch and Pre-Flower)
The first three weeks of flowering are a transitional period where your cannabis plants shift gears from vegetative growth into full reproductive mode.
This stage is critical—get it right, and you’ll set the foundation for dense, frosty buds. Get it wrong, and your yield or quality could suffer before buds even form.
Week 1 – The Transition Phase (The Stretch Begins)
Although you’ve flipped your light cycle (typically from 18/6 to 12/12), your plant doesn’t instantly stop vegetative growth. Instead, most strains enter a stretch phase—a hormonal surge that causes rapid vertical growth, sometimes doubling the plant’s height in 7–10 days. Internodes (the gaps between bud sites) may expand quickly, and stems elongate.
This is your final window to shape your plant’s structure. Techniques like low-stress training (LST), the ScrOG (Screen of Green) method, and supercropping can still be applied—but only gently.
After this week, training can stress plants and hurt bud development.
Key actions:
- Maintain veg nutrients with elevated nitrogen (N) during early transition.
- Start easing in bloom nutrients, introducing more phosphorus (P) and potassium (K).
- Double-check for light leaks in indoor tents or grow rooms—plants now require 12 full hours of complete darkness to stay in flower.
- Evaluate plant structure and apply final canopy shaping or spacing adjustments.
Related Article:
Week 2 – First Signs of Flowers (Pistils Emerge)
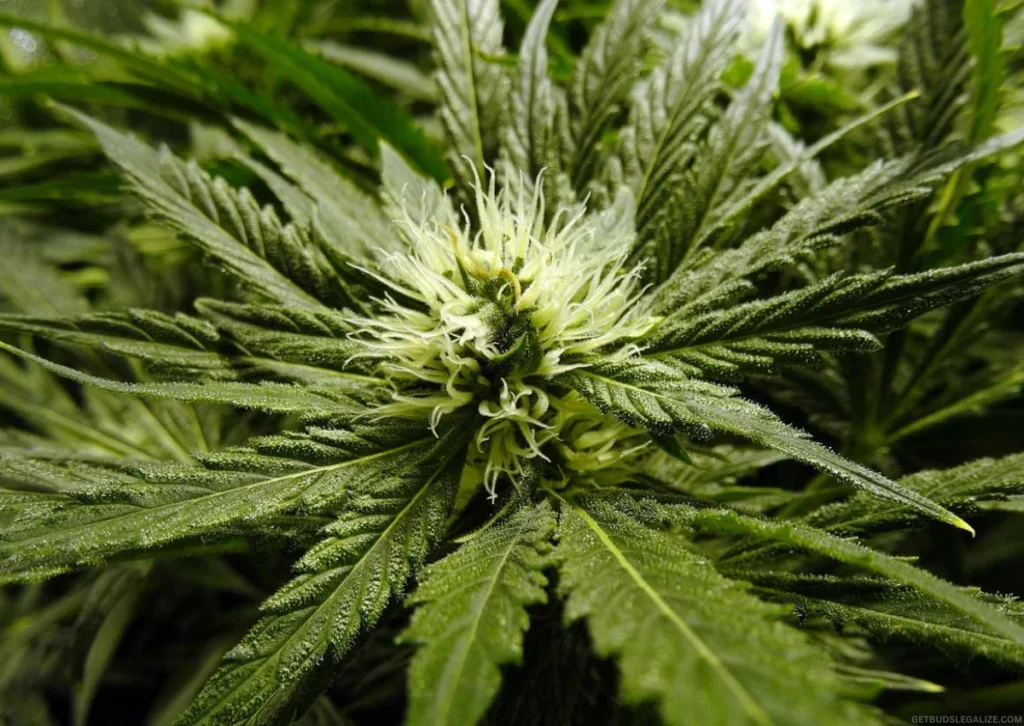
By the second week of flowering, your cannabis plants will begin to display the first clear signs of bloom—delicate white pistils emerging at the nodes where branches connect to the main stem. These fine hairs signal the initial development of bud sites.
If you’re growing from regular (non-feminized) seeds, now is the time to sex your plants and remove any males to prevent pollination and ensure a sinsemilla (seedless) harvest.
This stage also marks a period of accelerated hormonal activity. Your plants will begin responding more strongly to bloom nutrients and red-spectrum lighting, particularly around 660nm.
While vertical stretch may continue briefly, it typically slows by the end of the week.
Key actions:
- Remove male plants immediately if using regular (non-feminized) seeds to prevent pollination.
- Switch to bloom lighting with red-dominant wavelengths to support flower formation.
- Lower relative humidity to around 50–55% to reduce the risk of mold as floral growth begins.
- Inspect thoroughly for pests—flowering plants are more vulnerable to infestations.
Related Article:
Week 3 – Stretch Slows, Bud Formation Begins
By week three of flowering, your cannabis plants are now fully committed to the bloom phase. The rapid vertical stretch begins to taper off, and you’ll start to see clusters of white pistils developing at bud sites—clear indicators that flower formation is underway. Trichome production may begin, and your grow space will likely smell stronger as terpene synthesis ramps up.
This is an ideal stage for selective defoliation. Carefully remove large fan leaves that shade interior bud sites or block airflow. The goal is to open the canopy, enhance air exchange, and reduce humidity-related risks—but avoid over-stripping, which can stress the plant.
Your feeding schedule should now be fully transitioned to a bloom nutrient formula, rich in phosphorus and potassium.
It’s also crucial to monitor EC/PPM levels and adjust light distance to ensure optimal intensity without causing light stress.
Key actions:
- Conduct light defoliation to open the canopy and enhance light and airflow to inner bud sites.
- Adjust your grow light height to maintain an ideal distance: 30–45 cm (12–18 inches) from the canopy for most LED fixtures.
- Watch for early nutrient issues (especially phosphorus, potassium, and calcium deficiencies).
- Maintain strong airflow to avoid stagnant microclimates that cause mold or mildew.
Related Article:
Weeks 4–5: Mid Flowering (Rapid Bud Development)
At this stage, your cannabis plants have fully transitioned into reproductive mode. The energy that once went into leaves and stems is now channeled exclusively toward bud production, trichome development, and terpene synthesis.
These two weeks are often the most visually rewarding—your buds will bulk up, sparkle with resin, and give off an increasingly pungent aroma.
Week 4 – Bud Sites Multiply, Trichomes Begin to Sparkle
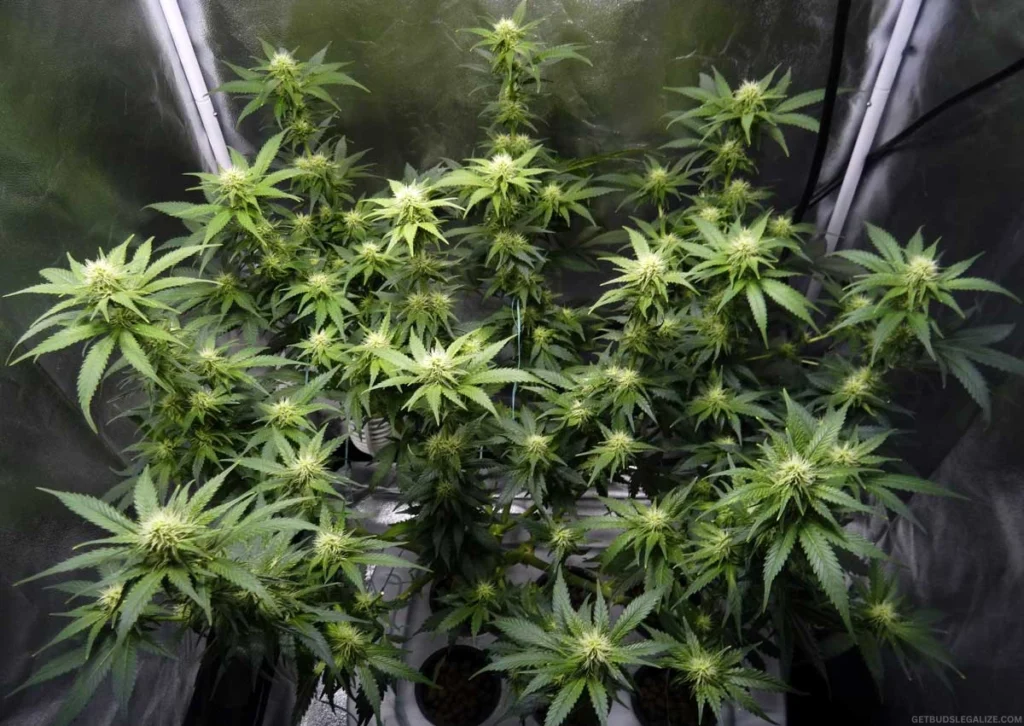
This is the week when the “flower stacking” process truly takes off. Buds start to form more densely along the branches, and calyxes begin piling up into what will eventually be the full colas.
Trichome development begins, coating leaves and buds in a sticky, crystalline layer of resin—this is where cannabinoids and terpenes are produced.
You’ll also see more pistils forming, still bright white at this stage. It’s critical to dial in your nutrient regimen and create an optimal environment that supports dense, resin-rich flowers without inviting mold.
Key actions:
- Apply full-strength bloom nutrients, focusing on phosphorus (P) and potassium (K) while reducing nitrogen levels.
- Add calcium and magnesium, especially when using RO water or growing in coco coir, to prevent common deficiencies.
- Maintain relative humidity at 45–50% to avoid mold or mildew, especially with trichomes forming.
- Avoid pruning, training, or any high-stress techniques—plants are too focused on bud development to recover efficiently.
- Consider introducing bud enhancers like potassium sulfate, seaweed extract, or beneficial microbes that promote flower bulking.
Week 5 – Peak Flowering and Weight Gain
By week five, buds gain significant mass, becoming noticeably thicker and denser. Some white pistils begin curling inward and darkening, signaling early ripening.
Terpene production surges, filling your grow space with a potent aroma, meaning odor control is now crucial.
At this stage, trichomes are still maturing, remaining mostly clear to slightly cloudy. Harvest isn’t quite ready, but now is the time to closely track bud development and prepare for the final ripening phase.
Key actions:
- Maintain odor control with carbon filters, inline fans, or air purifiers—especially if growing indoors or in a shared space.
- Check trichome maturity using a jeweler’s loupe or digital microscope—look for them to start turning cloudy, but not amber.
- Ensure adequate calcium and magnesium uptake, especially if your leaves show rust spots, curling tips, or interveinal yellowing.
- Support branches as buds get heavier—use trellising (ScrOG net), bamboo stakes, or plant yoyos to prevent snapping or bending.
- Double-check light distance from canopy: keep LEDs 30–40 cm (12–16 inches) above plants for optimal light penetration without burn.
Related Article:
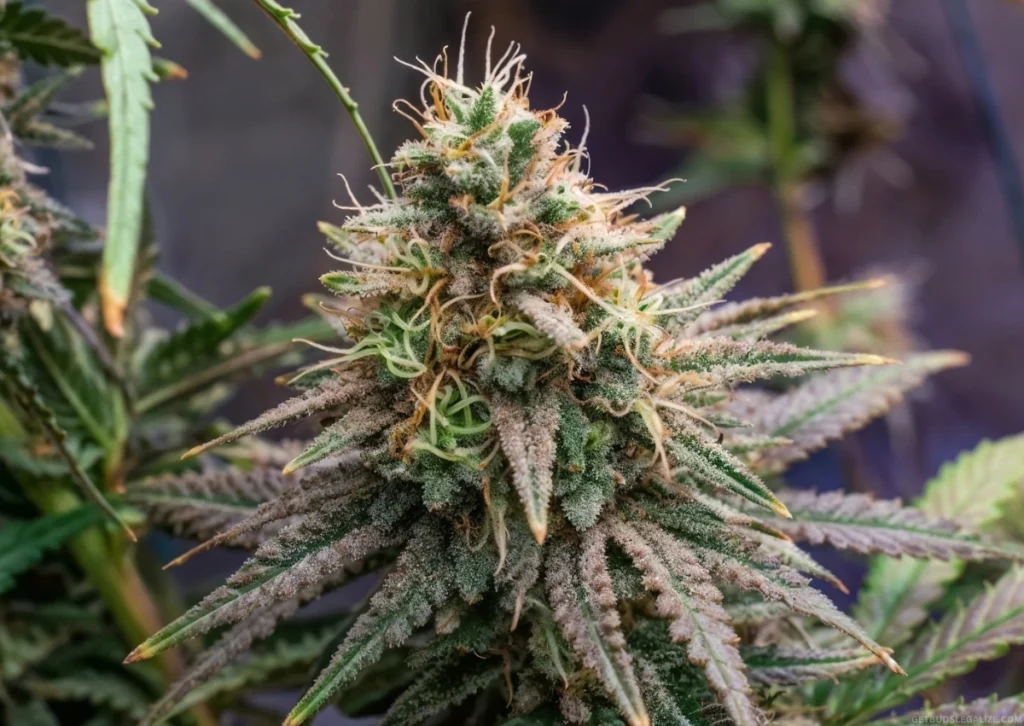
Weeks 6–8+: Late Flowering (Ripening and Flushing)
You’ve made it to the final stretch. At this point, your cannabis plants are channeling everything they’ve got into resin production, terpene expression, and final bud swelling. This phase is all about fine-tuning, closely monitoring trichome ripeness, and preparing for harvest.
The visual transformation is stunning—buds become dense, sticky, and fragrant, and the trichomes glisten like frost. But it’s also a delicate time when one wrong move (overfeeding, humidity spike, or late stress) can cause mold or reduce quality. Stay alert and patient.
Week 6 – Trichome Maturity and Terpene Richness
By now, your buds are nearing their full size. You’ll notice more white pistils darkening and curling inward.
Trichomes will begin turning from clear to cloudy, signaling a spike in cannabinoid concentration.
This is also when terpene production peaks, giving your grow room an unmistakable funk.
Visual signs:
- Buds feel dense and sticky, coated in developing resin.
- Trichomes are cloudy but not yet amber—cannabinoids are reaching their peak.
- Leaves may naturally yellow as the plant redirects energy to the final bud swelling.
Key actions:
- Begin pre-harvest prep: Clean trimming scissors, prepare a drying space (18–22°C, 50–60% RH), and label jars or trays.
- Avoid stressors like light leaks or major temperature swings to prevent hermaphroditism—watch for yellow “nanners” (pollen sacs) and remove them immediately.
- Continue bloom nutrients, but gradually taper to prevent excess buildup.
- Maintain RH at 45% or lower and ensure strong airflow to prevent mold and bud rot.
Week 7 – The Flushing Phase (Optional but Recommended)
If you’re growing in soil, coco, or hydroponics and have been feeding heavily, this is the ideal time to start flushing—watering with plain, pH-balanced water to remove residual nutrients and salts from the medium.
Flushing helps ensure a cleaner, smoother smoke by reducing harsh flavors or chemical residues in the buds.
👁️ Trichome status: Most are cloudy, with a few amber trichomes starting to appear. You’re now entering the harvest window, depending on your desired effect.
Key actions:
- Stop all nutrients and water with pH-balanced water (around 6.0–6.5 for soil).
- Observe trichomes with a jeweler’s loupe or digital microscope—aim for 70–90% cloudy and 5–20% amber for optimal potency.
- Maintain RH between 40–45% to prevent bud rot.
- Watch for foxtailing—new growth on mature buds can indicate stress or light too close.
Related Article:
Week 8+ – Final Ripening and Harvest Time
It’s harvest time—for most indica-dominant and hybrid strains, at least. Sativas may need up to 10–12 weeks total to reach full maturity.
Your buds should now be fat, resin-drenched, and aromatic. Most pistils will be dark, and trichomes should be mostly cloudy with a touch of amber, perfect for a balanced high.
Harvest when:
- 70–90% of pistils have darkened and curled in
- Trichomes are mostly cloudy with 10–30% amber (depending on desired effect)
Key actions:
- Cut plants at the base or branch-by-branch, preferably during the dark cycle or just before lights-on, to preserve terpene integrity.
- Hang-dry in a dark, well-ventilated room at 18–22°C (65–72°F) and 50–60% RH for 7–10 days.
- Avoid drying too fast or too slow. Aim for a snap-dry on stems and slightly crisp outer buds before trimming.
Related Article:
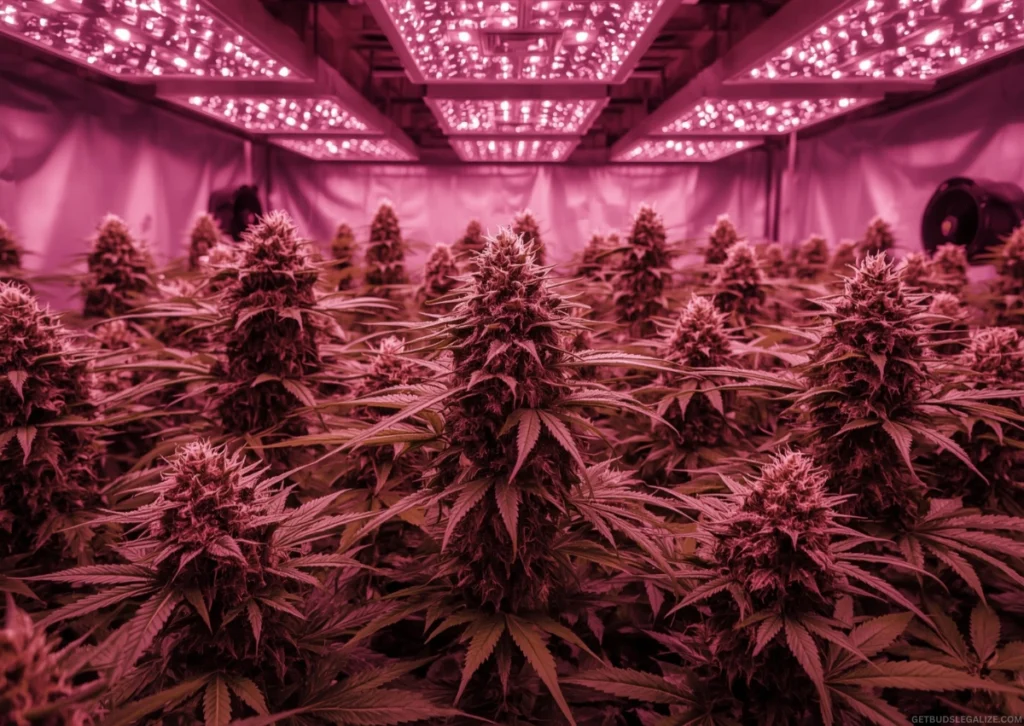
Pro Tips for Bigger, Better Buds
As your plants enter their final flowering weeks, small refinements make a big difference in yield, potency, and aroma.
Top growers optimize every factor—light, nutrients, airflow, and training—to ensure dense, resin-rich buds.
In this section, we’ll break down essential techniques to help maximize your harvest.
1. Start Strong With Healthy Plants
Only switch to flowering when your plants are vigorous, pest-free, and well-nourished. Problems left unresolved in veg—like nutrient deficiencies, pests, or weak structure—can worsen during bloom.
💡 Healthy plants = better bud formation, stronger stretch, and fewer issues.
2. Dial In Your Grow Room Conditions
Before and during flowering, keep environmental factors precisely balanced:
- Temperature: 22–26°C lights on, 17–20°C lights off
- Humidity: 50–55% early flower, 45–50% mid flower, 40–45% late flower
- VPD: 1.1–1.3 kPa to boost nutrient uptake
- Airflow: Oscillating fans and carbon-filtered exhausts to prevent mold
3. Use the Right Lighting Spectrum
Switch to full-spectrum LEDs or HPS with red/orange wavelengths (580–700nm) to stimulate trichome production and heavy flowering.
- Keep lights 30–45 cm from the canopy (adjust based on intensity).
- Monitor for light stress or bleaching—dim if needed.
4. Boost Growth With CO₂ (Advanced Growers)
In sealed grow rooms, increase CO₂ levels to 1000–1200 ppm during mid-flower (weeks 3–7). This amplifies photosynthesis, leading to larger yields when combined with strong lighting and feeding schedules.
5. Strengthen Nutrient Uptake
- Use fulvic acid (late veg to early bloom) to improve nutrient absorption.
- Supplement calcium & magnesium—especially for coco or LED grows, as deficiencies can weaken bud structure.
6. Trim Excess Foliage & Lollipopping
Prune lower branches early in flower to focus plant energy on top colas. This prevents wasted resources on lower sites that won’t get sufficient light.
7. Defoliate Selectively (Weeks 3–4)
Gently remove large fan leaves that block light from bud sites, allowing better airflow and light penetration. This enhances resin production while minimizing humidity-related risks.
⚠️ Avoid aggressive pruning after week 4, as excessive stress can slow bud development and impact yields.
8. Support Your Buds
As colas fatten, branches may sag or snap under the weight. Use stakes, trellis nets, or plant yoyos to support bud-heavy branches and maintain an even canopy.
9. Prevent Light & Nutrient Burn
- Light burn symptoms: Bleached tops, curled leaf edges.
- Nutrient burn symptoms: Brown, crispy leaf tips.
🔥 If symptoms appear, adjust the lighting distance or nutrient concentration accordingly.
10. Flush Properly (Final 10–14 Days)
Flushing removes excess nutrients, enhancing flavor, smoothness, and aroma in the final harvest.
- 💧 Use pH-balanced water (6.0–6.5 in soil) during the last two weeks to prevent harsh chemical buildup.
⚠️ Skipping this step can lead to harsh smoke and an undesirable aftertaste.
Final Thoughts: Happy Budding!
Flowering is the most rewarding yet crucial stage of cannabis cultivation—where careful observation and proactive care lead to top-tier, resin-rich buds.
Use this guide week by week to refine your techniques, troubleshoot challenges, and improve each growth cycle. With the right knowledge, patience, and precision, your best cannabis harvest is just weeks away!
Frequently Asked Questions (FAQs) about Cannabis Flowering Stage
The earliest signs include a rapid growth spurt (“stretch”) and the appearance of white pistils at the nodes. These early signs indicate the transition from vegetative growth to flowering.
Indoors, you start flowering by switching to a 12/12 light cycle. Outdoors, flowering starts naturally as days shorten. Only flip to bloom when your plants are strong, healthy, and mature.
Each flowering week marks a different phase of bud development—early stretch, mid-flower bulking, and late-stage ripening. Tracking this helps optimize feeding, light, and harvest timing.
Female plants develop white pistils at bud sites, while males grow pollen sacs. Remove male plants early to avoid pollination and preserve cannabinoid-rich, seedless buds.
During the vegetative stage, cannabis directs its energy toward leaf and stem growth, building structure and strength.
Once the flowering stage begins, the plant shifts focus to bud production, resin formation, and reproductive development, leading to cannabinoid-rich flowers ready for harvest.
During flowering, cannabis thrives on high phosphorus and potassium levels, while requiring less nitrogen. These key nutrients support dense bud formation, strong trichomes, and enhanced terpene production, maximizing both yield and potency.
Harvest when 70–90% of pistils darken and trichomes turn mostly cloudy, with a few amber ones appearing—this signals peak cannabinoid potency and optimal effects.
Adjust Harvest Timing Based on Desired Effects:
- For a relaxing, sedative high wait until more trichomes turn amber—this increases CBN content for a heavier, couch-lock effect.
- For a more uplifting, cerebral high (maximum THC): Harvest when trichomes are mostly cloudy with minimal amber, preserving THC for a more cerebral, clear-headed buzz.
Use a jeweler’s loupe or digital microscope to inspect trichomes closely. Clear trichomes mean it’s too early, and too many amber ones suggest degradation and reduced THC potency.
Trichomes drive bud growth by producing cannabinoids and terpenes. More trichomes typically mean stronger potency, stickier buds, and richer aroma profiles.
Yes. You can plant cannabis outdoors in nutrient-rich soil as long as the environment offers enough sunlight, airflow, and protection from pests and extreme weather.
Avoid heavy pruning during flowering marijuana stages. Light defoliation in early bloom is fine, but aggressive cuts can stunt bud growth and stress the plant.
In early bloom, focus on stabilizing your environment, providing bloom nutrients, and removing obstructive leaves. Cannabis plants early in flowering are vulnerable to stress and need consistency.
Buying high-quality seeds from reputable breeders ensures strong genetics and reliable growth, leading to consistent traits and better stability.
- Seeds offer genetic diversity, stronger taproots, and fewer risks of pests or disease.
- Clones provide a genetic copy of a proven plant, ideal for maintaining specific traits but more vulnerable to stress and infections.
The pre-flowering stage starts about 1–3 weeks after switching to 12/12 lighting (indoors) or as days shorten (outdoors). Pistils emerge, and plants begin forming early buds.
ILGM Fertilizer:
Feed Your Plants Right

The Ultimate Cannabis Fertilizer – designed to fuel every stage from seedling to harvest.
✅ Feeds 5+ plants
✅ Big savings with bundle
✅ Works in soil, coco, or hydro
✅ Supports bigger, healthier yields
ILGM Plant Protector:
Ultimate Cannabis Protection

Shield your plants from pests and disease—naturally and effectively.
Protect From Seedling to Harvest
✅ Protects up to 20 plants
✅ Works in soil, coco, or hydro
✅ Fights pests & diseases fast
✅ Keep your grow healthy & stress-free


